Cleat Replacement
It’s more common than the fear of spiders, snakes, darkness, or even clowns. People hate to do it. They think it will cause injury if they do it wrong. They think it’s a black art. What could be so terrifying?
Cleat replacement.
It’s true. Some of you are very adept at replacing your cleats. However, many of you – and we still love you – struggle mightily with it. For those that do not want to handle the placement and replacement of their own cleats, there are many qualified bike fitters and services that will handle this for you. We want to cover 1) accurately replicating the position suggested by these professionals when your cleats wear out, and 2) some very basic setup tips for those without the means to see one of these professionals.
Basics, rules, and regulations
How does one know when it’s time to replace those cleats? For starters, they will look worn.

There is no hard and fast rule with visual wear. There are, however, a few indicators. On Shimano cleats, each of the ‘corners’ have colors depending on the amount of float they have. Yellow is six degree, red is zero degree, and my blue cleats have two degrees of float. If any of those colored covers are entirely worn off, it’s probably time for new cleats. My blue cleat has a good sized dent in it, but I think they still have some life in them.
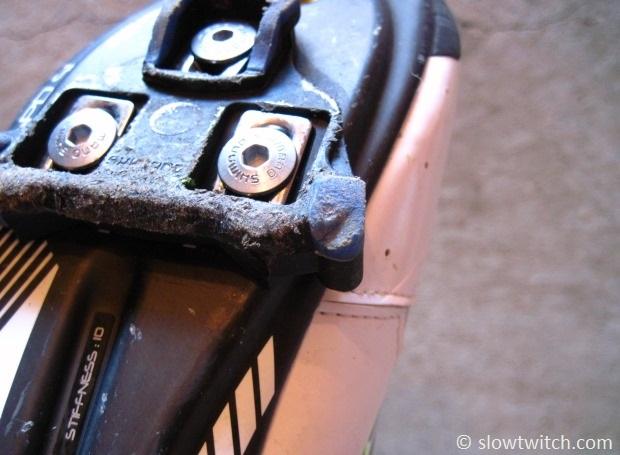
In general, the best places to look for wear are all of the edges that interact with the pedal. For example, Shimano cleats have a ‘ledge’ at the rear – this is what actually clips in to the pedal:

If this ledge gets worn and/or chewed up, it will become increasingly difficult to clip out of your pedals.
In fact, that is one of the best indicators of cleat wear – feel. Most cleats will feel tight for the first ride or two when they’re brand new. After the initial break-in, they should feel ‘normal’ – a crisp clip-in action followed by a smooth and even clip-out. As they get worn, they will tend to feel increasingly sloppy while clipped; some will even allow for pronation, supination, and a huge amount of overall wobbliness. When you do attempt to clip out of your wobbly old cleats, it tends to feel difficult or vague.
My best advice is this: check them periodically. Replace them before they’re destroyed. Do NOT replace them right before your big race (usually 3-4 weeks prior is about perfect). Similar to chain replacement intervals – if you can’t remember the last time you did it, or you’re sure you’ve never done it – do it now. Putting it off is not worth the risk of injury or being stuck on the side of the road with a broken cleat.
Basic Placement Tips
There are three elements of cleat placement:
1. Fore/aft
2. Side-to-side (lateral)
3. Rotation
The most important thing – the one overarching rule of Cleat Club – is this:
ONLY REMOVE ONE CLEAT AT A TIME. One. Solamente uno. No kidding.

Why only one? Because you’re going to use the other one to guide you. This, of course, assumes that your cleats are set up properly in the first place – AND that you check to make sure the bolts are tight periodically so they haven’t drifted out of place. For the purposes of this demo, we’ll take the risk of assuming that your cleats were in the right place to begin with.
[Editor's note: Some have commented that a person's cleats may not or should not be set up symmetrically for a variety of reasons – traumatic injury to one side of the body, imbalance, etc. If that is the case, you obviously do not want to set up your cleats symmetrically. At least in this editor's experience, the vast majority of cyclists – right or wrong – ride wish to ride with symmetric cleats and/or treat the imbalance in their body to allow for riding with symmetric cleats.]
The second rule of cleat replacement is almost as important as the first: Do NOT trust the markings on the bottom of your shoe. These markings could be lines, dots, brand logos, or textured sand paint:

I am not singling out any one brand of shoe when I make the suggestion to look at the markings with a suspicious eye. It’s a fact of life. Some people make the mistake of assuming that if they buy the new version of the same brand and model they’ve owned for years, that the sole markings will be in the exact same place. There is a small chance that you’ll get lucky and things match perfectly, but there is a much greater chance that they won’t.
The reason for this variability is that these markings are typically put on by hand, or have some human element involved. They might be stickers that lay on top of the sole. They might be painted on. They might be decals that are laid under the top layer of carbon and effectively baked in to the shoe. Whatever the case, there is variability in the process. Even if the markings appear identical at first glance, it never hurts to check.
The best thing to do is establish objective measurements from hard points on the shoe. The most important one is this – fore/aft:

The specifics of how you want to do this are up to you. The starting and ending points for your measurement will depend on your brand of shoe and cleat. You want something that is easy and repeatable. There are no straight lines or perfect reference points on a shoe, so take your time and double/triple check.
After you’ve established the fore/aft measurement, tighten down the bolts just enough to hold the cleat in place while still allowing you to push it around with some effort.
Next, you need to get the cleat in the right lateral position. For this, you need to find and compare reference points on the sole. As we mentioned above, the ‘soft’ points tend to be unreliable – dots, hash marks, and logos. Whenever possible, I try to establish some ‘hard’ reference points, such as ledges or contours on the sole.

In the above photo, the edge on my cleat is hanging about 2mm over the ledge on the sole. I want to repeat that same amount on the cleat I am replacing.
You want to find more than one of these ‘hard’ reference points. Why? Believe it or not, they can be unreliable, too. You might think that a molded carbon sole would be ‘perfect’. We all picture carbon parts coming off an assembly line being perfectly identical. In reality, they come out very similar, but often go through a hand finishing process involving sanding, filing, or other manual processes. Your carbon rims and $3,000 carbon frame were very likely subjected to this, too.
Why is it done? It’s all for consistent and smooth appearance. We want our stuff to look good. The side effect is small variation in material thickness. If your carbon rims are making noise or pulsing under braking, it could have nothing to do with the brake pad or rim material. The braking surface could be hand-sandblasted and have less-than-straight walls that are causing the poor braking (I’m not putting this out there as a ‘guess’, either – it actually happens). On a shoe, this could mean that the edges and ledges on your sole are not exactly identical. If you have multiple check points, your chance of accurate placement go up.
The rotation of the cleat is one of those things that is and always will be somewhat subjective. I always hold both shoes out at a full arm’s length and compare the two. What I’m looking for is the angle of the cleat relative to the curved last of the shoe.

I always look at the shoes and cleats for a moment, pause, and then look away. The step of looking away is almost like cleansing your cleat pallet. If you stare at the shoes too long, you begin to influence the process. You might angle one hand differently so that the cleat angles match, but the last curves do not. You want to look at it as objectively as possible so that both the soles AND the cleats match.
ALSO – keep in mind that changing the rotation of the cleat can often affect the fore/aft and side-to-side adjustments slightly. It’s like setting up a front derailleur. Changing one adjustment can affect the others if you’re not careful.
Once your cleat is 100% in-position, slowly tighten down the bolts. Rotate between the three bolts, tightening down each one a little bit at a time.
Dealing with different shoe brands
If you own two different brands of shoes, there is an easy way to set the cleats up identically – use the method detailed above. Not all shoes have the cleat holes in the same place, so it is NOT a case where you can just ballpark it. Objective measurements must be taken with a tape measure.
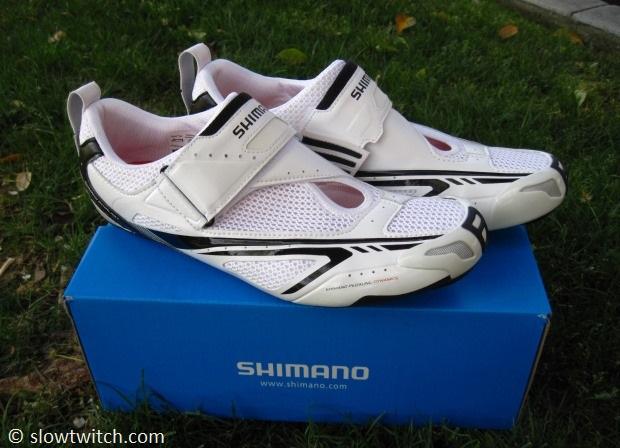
For example, the cleat holes on my Shimano TR60 shoes are fairly far back (towards the heel) in comparison to some other brands. If you look at the gap between the bolt head and the square washer, you can see that they’re roughly in the middle of their adjustment range:

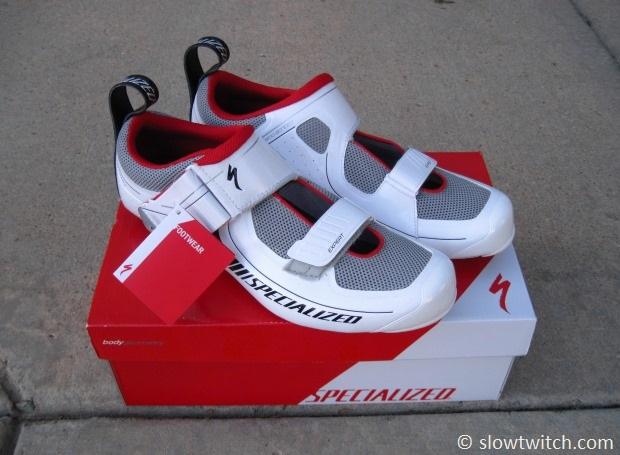
Some shoes – such as those Shimano TR60’s – have fore/aft adjustability built in to the sole of the shoe. Others, such as my Specialized Trivents, have fixed bolt receptacles:

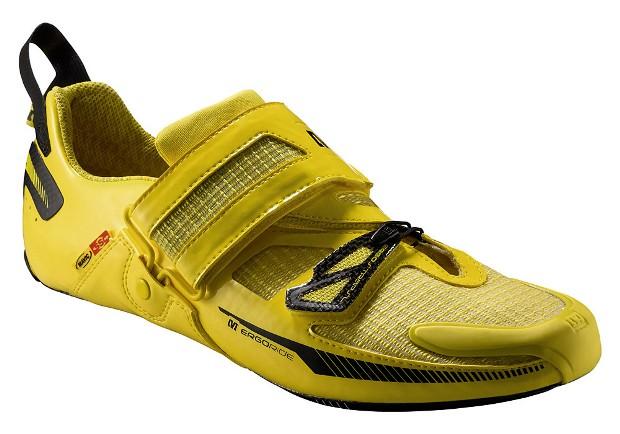
Mavic shoes have cleat holes that are adjustable, but also further forward than most other brands. As a result, I have my cleats slammed all the way back to achieve the same position as my Specialized shoes:

We should also note that different brands of shoe can have a different angle built in to the sole. If you use any sort of wedges between your cleat and shoe – or inside of the shoe – you’ll want to take the shoe’s angle into account.
Speedplay cleats
Many of you ride with Speedplay pedals. For most cycling shoes, these require a 3-bolt adapter plate (there are a few newer shoes that are offered in a special Speedplay 4-bolt version).
When using the adapter plate, their process effectively isolates the three setup metrics (fore/aft, side-to-side, and rotation) into three separate steps.

In the photo above, you can see that the black adapter plate ONLY allows for fore/aft adjustment. Once it is set, you install the rest of the cleat on top of it and cannot adjust it again without starting over.
The main portion of the cleat (right in the above photo) allows for side-to-side adjustment.

The above photo also shows why Speedplay cleat users must be extra cognizant of cleat wear – the four screws are flush with the bottom of the shoe. When you walk around on them, you’re not only wearing out the body of the cleat, but also the faces of the screws. I’ve seen the screws get so worn down that they no longer look like screws… they are completely worn flat. In that case, you must use a rotary grinder to cut a slot into the surface of it and use a flathead screwdriver for removal. It’s fun… only not.
The rotation adjustment of Speedplay cleats depends on the model you get. The lower-end X-series have ‘infinite’ float, meaning that there is no adjustment, per se. The Zero models allow you to set the stopping points for the float range, seen here:

It should go without saying that you want to re-create these stopping points when replacing your cleats.
Mountain bike cleats
What about mountain bike cleats? I won’t get into too much detail, so we’ll cover the very common Shimano SPD for now.

As you can see in the above photo, mountain bike cleats allow for both fore/aft and side-to-side adjustment. They do allow for some rotation adjustment, but it tends to be less than most road cleats. SPDs effectively have some ‘slop’ designed in to them that allow you to manipulate rotation.
Some people have asked me how to set up cleats identically between their road and mountain shoes. For folks that train during the winter on a cyclocross or mountain bike, this is a legitimate concern.
Unfortunately, there isn’t a 100% perfect method. Here’s what I do:

Clip one shoe in to each bike (road and mountain). Flip the shoe over. Finally, lay a tape measure on top to measure from the tip of the toe to the center of the pedal’s axle. This will get you in the ballpark of fore/aft adjustment, but rotation and side-to-side adjustment will be up to you.
Taping Method
There is one trick that can help you avoid a lot of this mess – tape. If you have your cleats in absolutely-positively the best position in the universe, you can lay down pieces of electrical tape to ‘save’ it. Some people also use a permanent marker to do the same thing, but I prefer tape because it can easily be moved if needed.

If you get the tape just perfect, you can remove the old cleat and install your new one in exactly the same spot. My advice? Even if you do this, it is still a good idea to check with a tape measure after your new cleats are on.
Grease, Loctite, and Torque Wrenches
Should you use grease on your bolt threads? What about a thread-locking compound? Do I need to use a torque wrench when tightening the bolts?
All valid questions.
On the grease vs. Loctite debate, I choose grease. You can choose differently and I’m not going to fault you for it. The only thing I advise against is using nothing on the threads.
I use grease because I want to be able to get the bolts out later. You’re usually dealing with a steel bolt and/or steel bolt receptacle in the shoe, both of which can rust. Some argue that grease can cause the bolts to loosen over time, making low-strength Loctite a better choice.

I see their point, but I personally don’t think that low-strength Loctite is going to do a whole lot when you look at the torque involved in pedaling. I also don’t want to gum up the bolt receptacles in my shoes with dried-out Loctite.
My method is to use grease, and check the cleat bolts every now and then to make sure they’re tight (e.g. every couple months). When tightened properly, I very rarely find that a bolt has become loose – even with grease.
Should you use a torque wrench? Some shoe manufacturers suggest that you should. Torque specs are typically in the 5-6NM range. If you do use a torque wrench, I suggest that you only do it for the final tightening. As mentioned previously, you should tighten each cleat bolt a little bit at a time to avoid moving the cleat. If you decide to crank one bolt down to 6 newton-meters while ignoring the others, you’re going to ruin the cleat’s position. Get them started by hand until the cleat is secure – and then go to calibration heaven with the torque wrench.
All images © Greg Kopecky / slowtwitch.com


