Zwift: Welcome to Watopia
[Note: This article was originally published in Autumn, 2017, and has been updated to reflect changes over the past 12 months. This is the 1st of what will be 8ish articles on how to Zwift, the whole series binge-published over the next 2 weeks.]
With Zwift, cycling is a game. But it’s still cycling! Which makes it a purposeful game, whether your interest is training or racing. Let’s talk about how you can get Zwift installed and configured easily and inexpensively so you can ride in the Zwift virtual world.
We'll focus on the use of a Speed and Cadence Sensor, a $60 gadget you put on your bike that communicates with the "Game" (as Zwift calls its program), and is the most economical way to Zwift. We'll sift in descrptions of higher-tech options, like a power meter or a smart trainer.
Alright, I’m interested in this whole Zwifting thing. Where do I start?
Let's get up and running with Zwift using the most minimal approach possible. We just want to ride. This is for the person who wants to ride and have fun without taking out a second mortgage on the house or selling organs on the black market (you’ll likely need your organs for riding with Zwift, anyway). Using Zwift doesn't require a power meter or smart trainer. You can do just fine with your old trainer thanks to a concept called "Virtual Power".

What is Virtual Power?
Some really smart people have figured out that an estimated power number can be derived from the rider’s weight, speed, tire size, and the resistance curve of the rider’s specific trainer. Every trainer has its own personality that can be described as its resistance curve. Regardless of the resistance type – wind, magnetic, fluid, or electromagnetic – that curve can be measured and mapped. Virtual Power has been a revolutionary development in indoor training.
How good is Virtual Power? It’s not perfect, but short of owning a power meter or a smart trainer, it’s going to do the job. There are a few ways to make sure Virtual Power is as reliable and as accurate as it can be, and we'll talk about that in a minute. Suffice it to say it does what we need it to do.
What Equipment Do I Need?
In order to ride with Zwift, you need the following hardware:
– A bike
– An ANT+ or Bluetooth speed sensor
– A stationary trainer or rollers
– A computer
– An ANT+ receiver (aka, “dongle”) if you're communicating using ANT+
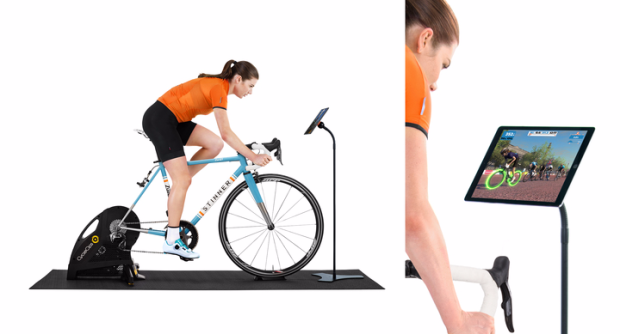
Beyond these, you will probably want a few accessories to make your pain cave less painful – such as a wheel riser to bring the front wheel up to level (that old college textbook you never read will work), a trainer mat to protect your flooring, a stand for your computer or tablet, so everything is visible and within reach, a fan, and a towel. If you or your coach want more numbers you may also want a cadence sensor and heartrate monitor, and you may find convenient a USB extension cord to place your ANT+ dongle. But these are electives, and not mandatory.
Stationary Trainer: For our initial Zwift experience, we’re using virtual power, so you can use basically any non-”smart” trainer or rollers. The level of support and accuracy varies, so it is best to refer to Zwift’s knowledge base of trainers.
Zwift has two levels of Virtual Power: Classic power and zPower. zPower is the more precise option, where the power curve has been calibrated by the Zwift team and is limited to a few select models now. Classic power is less precise, but increases the chance that your trainer will be supported.
Speed Sensor: For speed, you need an ANT+ or Bluetooth speed sensor mounted at the rear wheel. A couple of popular options are available from Garmin or Wahoo. The Garmin speed sensor is part of a speed/cadence sensor bundle, while the Wahoo RPM speed sensor is available by itself. These newer sensors allow for an easy install on the rear hub, which is nice if you want to move them from bike to bike. There are other compatible sensors that mount to the chainstay, like the older Garmins. There are also sensors that are proprietary and will not work. As long as your sensor transmits via ANT+ or Bluetooth (which should be indicated on the sensor itself), you’re good to go.
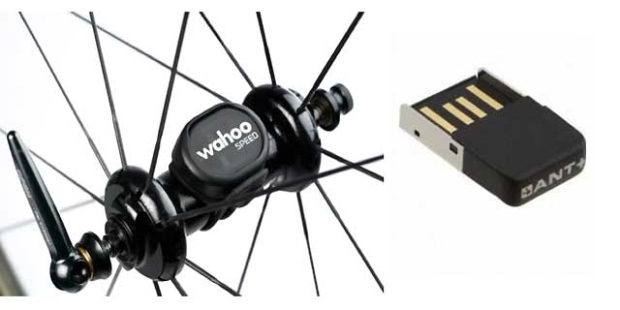
Receiver/Dongle: Your speed sensor now needs to have a way to communicate with your computer. How you make this connection depends on if you are using ANT+ or Bluetooth.
If you have any ANT+ devices, you will need an ANT+ dongle. If you have other fitness equipment, you might already have one. There's a bunch of them on the market, and you can get them for about $20 from a supplier such as Digikey. If you have any connectivity issues, you can improve your connection by having a fan to circulate air, using a USB extension cable to place the dongle closer to the speed sensor, or removing other electronic devices from the area.
For the Bluetooth user, you have a bit different way of connecting and that depends upon what kind of device you will run Zwift, so let’s jump into that discussion.
A Computer, Tablet, or Smartphone: With all the hardware in place, you now need a home for the software. Zwift can be installed on a PC or Mac meeting the minimum hardware requirements, or a compatible Apple iOS device. If you have a Bluetooth speed sensor, you can connect directly to your iOS device without any kind of extra dongle. If you have a Bluetooth speed sensor, you can also use a Bluetooth-capable Android or iOS smartphone to bridge the gap using the Zwift Mobile Link iPhone/Android app. So, there are a few ways to connect:
1. ANT+ speed sensor → ANT+ USB dongle → PC or Mac
2. Bluetooth speed sensor → Smartphone with Zwift Companion App → PC or Mac
3. Bluetooth speed sensor → iOS device (iPad)
Finally, you will need to maintain an Internet connection while riding Zwift.
Here is what I used for the purposes of this article, and I installed Zwift on two different computers or devices:
– Kurt Kinetic Road Machine trainer
– Wahoo RPM Speed Sensor (transmits both Bluetooth and ANT+)
– DigiKey ANT+ Dongle
Windows computer:
– Zwift installed on HP Envy Laptop
– Intel Core i5-3317U CPU at 1.70 GHz with 2 cores
– Windows 10
– 16 GB of memory
– Intel HD Graphics 4000 GPU
iOS device:
– Also installed on iPad Mini 4
– iOS version 10.3.3 (we're now up to 12.0.1. as of this writing and everything is still hunky dory).
With your trainer, sensors, dongles, and computer in place, you now have the foundation for virtual training. If you shop around, you can get everything here minus the computer for under $300. Note that this hardware setup is not limited to use with Zwift – you can use a variety of applications with this virtual power setup. Look for a few more articles covering other options soon.
Alright, I got the hardware. Gimme Zwift!
Now that you have the hardware, you are ready to obtain the software. Zwift offers a free 7-day trial and you just download the version you need from their home page. The download is fairly quick and small, but note that the actual installation is going to take a while. The initial installation is your fairly typical Windows installation – agree to the user terms and conditions, choose where you want Zwift installed, and click finish. This doesn’t take long at all. The first time you go to run Zwift, the startup process will go out and retrieve additional components over the Internet. This takes a little bit longer. Using a Windows laptop over a good WiFi network with a high-speed Internet connection took about 30 minutes from starting the download to being able to get ready to ride. Installing the iOS app on an iPad using the same user profile didn’t take long at all. So, keep that in mind if you’re excited to get going and ride the first time.
During the startup process, you have the opportunity to log in:
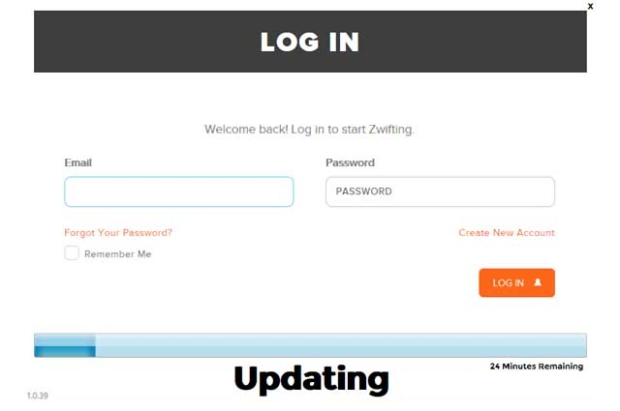
In our case, we’re a new user, so we’ll click the Create New Account link and get ourselves set up as a Zwift user. First, we’ll enter some basic profile info.
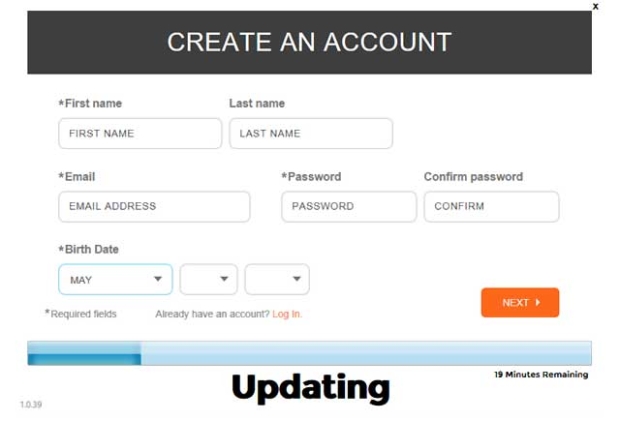
And then we’ll add a little bit more information about ourselves:
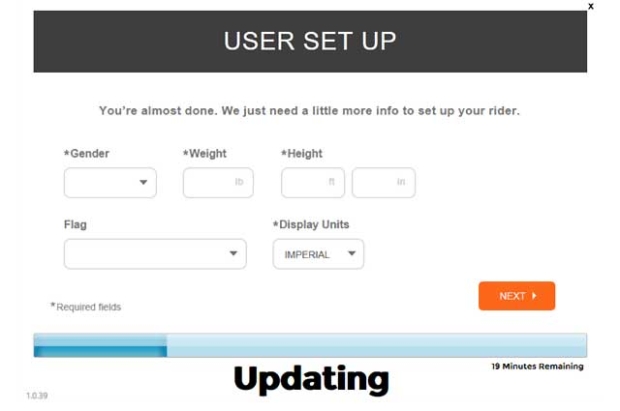
When setting up your profile, you will want to be honest about yourself. Zwift is interactive and offers ways to earn points and other rewards as you ride, so you are competing with others for KOMs, etc. Your weight is important for not only the virtual power calculation, but the integrity of your results. Don’t be a zDoper.
Once your account is set up, you can make changes in the application or on the Zwift website.
It’s Time To Ride! Almost…
Before you can ride, you need to get a couple of things ready. First, get your bike installed on the trainer. With Virtual Power like zPower, it is important to make sure you do the following:
– Always inflate your tire to the same pressure.
– When tightening down your trainer on your tire, always tighten it at the same place on the tire. The stem makes for an easy reference point.
– When tightening down your trainer on the tire, bring the tension unit up to the tire, and then crank it down the same number of turns every time. You want to make sure you have tightened it down enough that the tire does not slip.
Following these few tips will help to ensure that virtual power is as consistent as possible.
Assuming everything is plugged in and operational, hop on the bike, start to spin, and fire up Zwift. The first screen you encounter in Zwift is the Device Pairing screen:
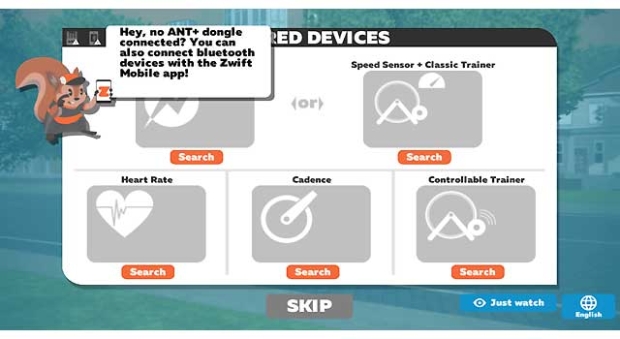
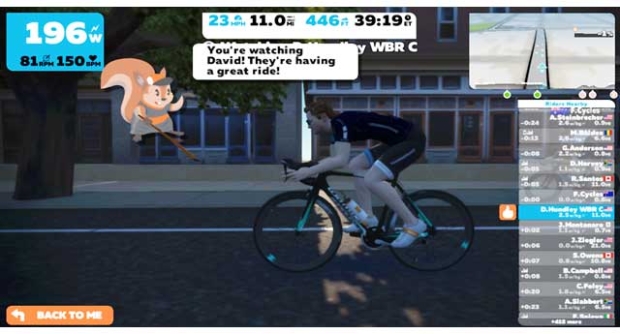
Since this is our first ride, your screen will look like the one above. If you hesitate, things start to get a little weird – a squirrel starts to talk to you. In case you’re wondering, the squirrel’s name is Scotty. At this point, we can click the “Just Watch” button to watch other people having fun and getting in a good workout:
But, we’re here to ride! Click on the appropriate buttons to pair any devices you have. For our Virtual Power setup purposes, we will select the Search button under the “Speed Sensor + Classic Trainer” icon. Zwift will now identify any devices it finds via ANT+ and Bluetooth, and you will see the following screen:
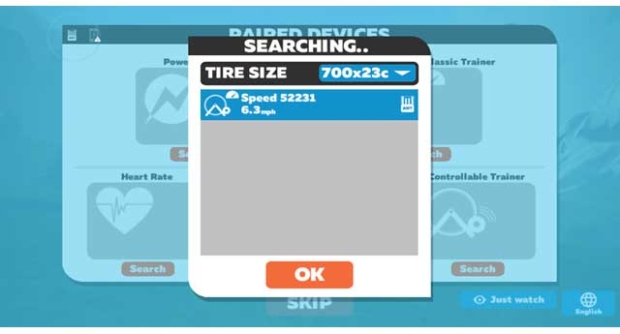
Once your speed sensor is paired, select the wheel/tire size closest to yours and click OK. You will now be prompted to select your trainer:
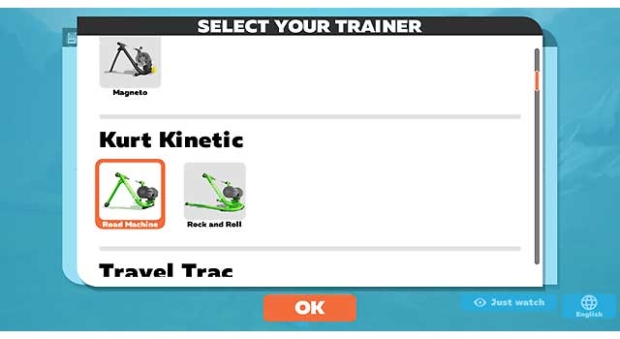
You will see that there are quite a few trainers specified. Since we are using zPower, you won’t see any smart trainers here. Those are paired under a different option on the Device Pairing screen. You will see a really good selection of trainers from the last few years, but if you don’t find your trainer or rollers, there is an option for “other” at the bottom. This will likely be less accurate than having a specific supported trainer, but it will work. In this case, we have selected a Kurt Kinetic Road Machine. Select your trainer and click OK to return to the Device Pairing screen. The Device Pairing screen will now indicate how you are connected:
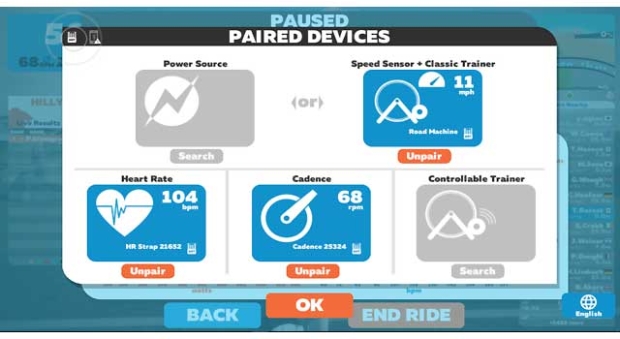
In this case, we are also paired up with a heart rate monitor and a cadence sensor, which are optional for riding purposes. All of the devices are connected via ANT+ as shown in the lower right corner of each section. We can see that they are working, as the measured values are being shown. Let’s click OK to hit the last screen before we ride:
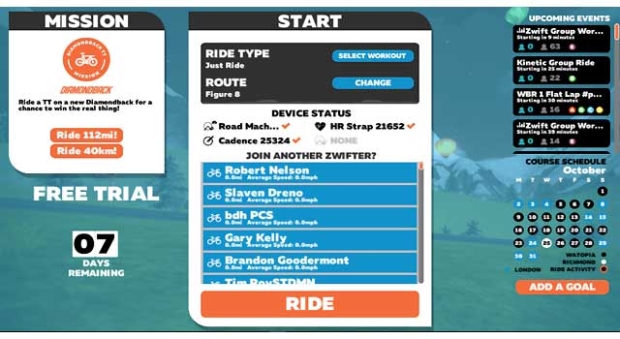
There is quite a bit going on here. For our purposes, we are just going to take the defaults. We will cover all of this in more detail in a future article. Click the Ride button.
I’m Zwifting! I’m Zwifting! I’m a Zwifter! I Zwift!
Congratulations! You are now riding Zwift using Virtual Power in Free Ride mode. You may already be pedaling, so your character (your “avatar”) will pedal accordingly. If you’ve got the sound turned up, you can even hear them/you clip in.
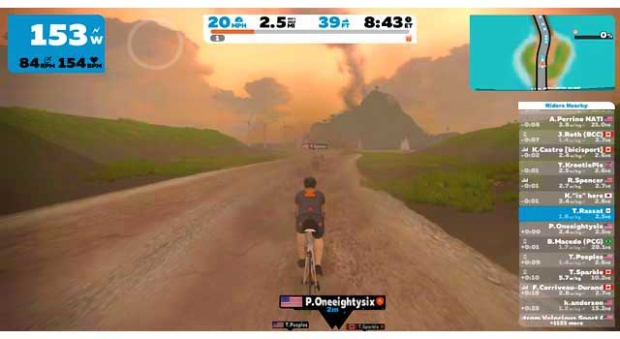
Once you overcome the initial rush of seeing your virtual you pedaling along down the road, you’ll notice there is a lot of other information on the screen – also known as the Zwift HUD (Heads Up Display).
But that's enough for now! We'll cover all this in a second installment that will follow close on the heels of this one. We'll decipher the Zwift HUD; explain what you do when you come to intersections; we'll discuss the ride statistics after you've finished; and then we'll talk about how to share your ride on MapMyRide, Strava, GarminConnect and others.
If you want to take a next step, here's a deeper dive into Zwift.
Here's the whole series:
1. Welcome to Watopia: Install Zwift using virtual power, the most cost-effective option.
2. Zwift, The Deeper Dive: One more layer below the surface.
3. It's Game On With Zwift: Zwift is a game, but also a virtual community.
4. Zwift: Let's Dance! The social aspect; Zwift is a Massive Multiplayer Game.
5. Zwift: A Potent Tool for Training: Zwift’s workout mode.
6. On Zwift Every Day is Race Day: Zwift's racing culture and community.
And, for extra credit…
7. ERG Mode in Zwift: Handy for ride leaders, and/or when your legs aren't quite up to it.


