The Aerodynamics of hand height
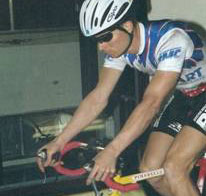
A couple of years ago I was doing a new bar study and took some pretty well staged photos to write an article about bars. I never got around to the article but I stumbled onto the data again and I’ve decided to write it.
There is no agenda – as aerobar makers like myself sometimes have – attached to this inquiry. It’s just more info to help you explore and define your own best rider position.
The results of the runs are given as an average of the aero drag through a range of 0 – 5 – 10 – 15 degrees or yaw, or crosswind. The results from each yaw angle are given a different value or percentage of the total. Most riders see very little time at “0” head wind, they see a lot at 5 and 10 degrees yaw and not to much at 15 degrees. The amount of time you feel a wind at the larger angles is a factor of how fast you go — the slower you are the apparent crosswind you have [Editor’s note: Hed has a Yaw Calculator on its website to help demonstrate this].
I also tested at a corrected 30mph, we do this to get more stable drag numbers. Most wind tunnels are built to test much larger objects with drag forces in the hundreds of pounds. A typical bicycle with rider only has drag force of about 7 pounds on average. The Texas A&M tunnel where I did this test, will repeatedly measure down to 4 grams difference, it’s very accurate for cycling. People always say, ”I can’t go that fast” and while that might be true, the end results at a more realistic 20 – 24 mph turn out exactly the same.
So I purposely used a very basic bike, I used a standard steel round tube frame with standard 32 hole box rim wheels. Using some aero frame would have been okay but I really wanted to just study hand and bar positions and see how the air reacted. Testing with large aero section wheels will always mask small changes because of the airflow hysteresis* as you run the yaw sweeps during the testing. I also tested some basic things like, if you have the zipper open on your jersey, or you use a CamelBak under the jersey, fun things to know. [Editor’s note: What John means by “airflow hysteresis” is the tendency for the air to “remember” the shape of its flow around an object as a bike is angled via a turret in the tunnel. Deep section wheels and frame tubes enhance this tendency, and may overshadow the changes in drag caused by altering hand positions.]
The base set up started with the rider on the bar tops, recreational riding style. I used a rider who was at the tunnel doing work on his TT position and equipment, he’s about 5’11” and 155lbs. Our base position starting point was an average drag of 10.38 lbs. or 4715 grams of drag. This means that every square inch of exposed surface is “feeling” a pressure of 10.38 lbs. While this particular rider is easily capable of producing very high watts, I have used a number to figure the time differences of 200 watts average. Our base line time for a 40k, or roughly 25mile event would be 1:17:45 @19.17 mph. The game in cycling aerodynamics is to then see how you can make that pressure be less on the rider. Because humans are not very good engines, it takes many long hours and a lot of miles to increase the power of the rider through training. Decreasing the drag is easier than building rider power.
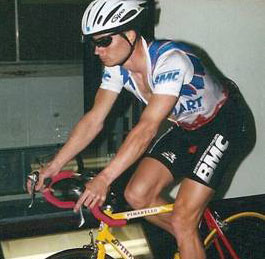
The next test was having the rider on the brake hoods in typical racing form. We had the jersey zipper open all the way for this. This resulted in a drag of 9.176 lbs or 4165 grams. This gave a 40k time of 1:14:55 @19.9mp Next we closed the zipper. This dropped the drag to 8.804lbs or 3997 grams, or 1:13:59 @20.16mph (so, close up those zippers).
That’s quite a difference and it helps show the effect of airflow across the chest area. As we move along, working with airflow around the chest and stomach will really drop the drag numbers. Just to gain more data, we had the rider go to his drops. At triathlons we see this a lot — riders have aerobars but they ride on the drops. This usually is a result of lack of comfort or bad positioning. This resulted in a drag force of 7.852 lbs. or 3564 grams, for an anticpated 40k time of 1:11:29 @20.86mph. This is an improvement over the brake hoods but there is still a lot of room for improvement.
Next I moved on to aerobar setup. I used a standard adjustable clip on bar on the original road bars. This was not an equipment test, only general positioning guidelines. Not to stray off course here, but I will go into a small discussion about bar positioning and effects. The individual riders shoulder shape, chest shape and back shape all effect the final best position for each rider. This is great to know and if you have access to a wind tunnel, you can work out every last detail for an individual rider, most people don’t have a wind tunnel available or the desire to spend the large amount of money involved. While doing a rider positioning, you need to visually look for problems, wide knees generally aren’t good, loose clothing is terrible, very high shoulder heights are not good and hands lower than the elbow pads generally are a bad thing. I have also found that helmet choice will not effect position choice, get the position right for best aero and power and then get the right helmet.
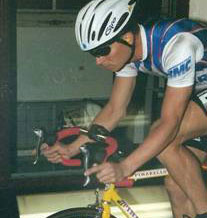
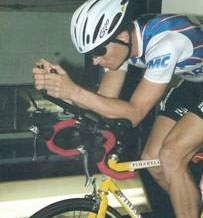
For our aero bar testing we used the same seat angle and saddle position. This rider had good flexibility and pelvic rotation, I wanted to compare apples to apples on equipment so I did not rotate him more forward for just the aero bar test. Our first set of runs were with the elbows set wide — approximately thigh width — then I changed the bars from a high position, to a mid position to a flat position. This picture is of the bars at medium height, wide elbows. The results of the three bar height runs were:
Bars high
Drag = 7.055lbs (3203 grams)
40k in 1:09:13 @21.35mph.
Bars med
Drag 7.227lbs. (3281grams)
40k in 1:09:43 @21.39
Bars flat
Drag = 7.106lbs. (3228grams)
40k in 1:09:22 @21.5mph.
Next I moved on to elbows in a narrow position, not extreme narrowness but as close as comfortable for normal age group racers.
Bars high
Drag = 7.068lbs. (3209grams)
40k in1:09:15 @21.53 mph.
Bars medium
Drag = 6.986 lbs. (3171grams)
40k in 1:09:01@21.6mph
Bars flat
Drag = 7.187 lbs. (3263 grams)
40k in 1:09:36 @21.43mph.
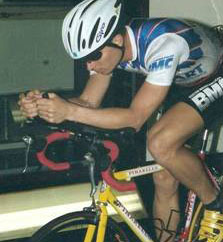
It is easy to see that using aero bars is a good thing, It also is easy to see that unless you are competing for every last second, there’s not a huge difference in the many variable bar, hand and elbow positions. I do a lot of rider positioning work that is not done in a controlled wind tunnel, and what I find is that rider comfort and the ability to stay in the aero bars is far more important. Also note that in this test elbow widths determined the best hand height positions.
The greater availability of power measuring equipment means a rider might dial in a position offering 10 or 15 percent more power by moving the location of the elbow pads or hand height. This additional power will almost always more than offset any minor increase in drag.
As an example, if we take the worst of the aero bar setups in this test and plug in an additional 20 watts, the times will drop to a 40k of 1:07:10 versus 1:09:43.
At this time I’m not a very big fan of the “hands in your face” positions for triathletes. Yes, they can be fast, but for multisport racing I do not find them very comfortable. I also have found that when a rider rides upwards or beyond an 80-degree seat angle position, the high hands generally are not as good as lower hand positions. This applies to both power generation and drag. Road racers have to deal with rules limiting the seat to bottom bracket relationships, so hand height is something important for them to consider.
As usual, this testing only led to the need to do more testing, specifically with a forward geometry rider, possibly including two different shoulder shapes and the two basic back shapes. I’ll be working toward that.

