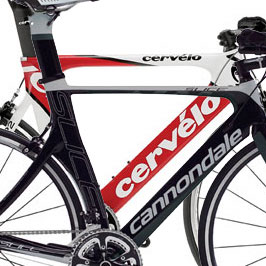
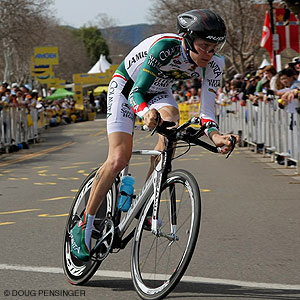
The Slice is built (sort of)
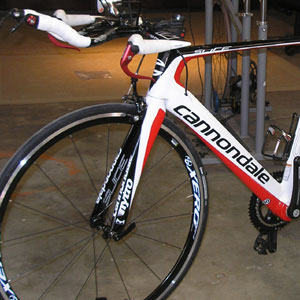
It's nice when things work out like they're supposed to (rather, like I think they're supposed to). This is particularly true if you have a fit system based on math.
As the late senator Moynihan put it, "Everyone is entitled to his own opinions, but not his own math."
Okay, he said facts, not math, but the idea's the same. If you're Einstein, you get to use your own math; everybody else has to use the community math.
So I mathed my way to an intended front-end config for the Cannondale Slice, such exercises described here. My idea was to change my front-end config—normalizing my new Slice to fit like my existing P3—through using a very low profile headset top cap, no headset spacers, and a flatter-pitched stem.
I had this all worked out nicely and was prepared to execute it. After some reflection, I decided to go with a low-profile aerobar instead.
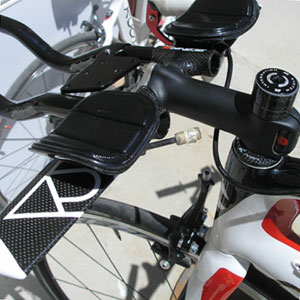
I'd had a Felt Devox I'd been wanting to try. The 3T Ventus bar I'd been riding on my P3 has armrests that sit about 8cm above the head tube top. I know this because I put the bike on a trainer, leveled it, placed a level at the head tube top and, with the level level, and angled from the head tube top over to just underneath one of the armrests, I put a ruler on top of the level and measured up to the armrest.
Knowing the spatial difference (in height) between the Felt Devox bar and the Ventus (the Ventus is about 2cm taller than the Devox), and using the Slice's stock 10mm top cap, I chose a stem pitch that would give me 6.5cm of height between the Slice's headset top cap and the Devox aerobar pads. This put me to within 2mm of the difference in stack between the P3 and the Slice.
I also needed a slightly longer stem to normalize for the Slice's shorter reach. So, I chose a 105mm stem on the Slice to give me the same cockpit distance as a 90mm stem built into the Ventus mounted on my P3. The stem I chose, by the way, is an old and very reliable Syntace Megaforce, built to accommodate a 26.0mm handlebar clamp diameter, which is what the Devox uses.
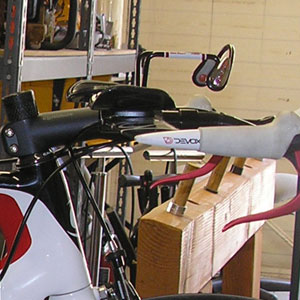
It all fit like a charm, and I did it with a down-turned stem and no headset spacers (my preference when I can make that config work).
The bike I got for this TT is a Slice 5—the entry level Slice—and I left on this Slice's components to the degree I felt comfortable. The SRAM Rival derailleurs seem to shift fine. The cable routing was fairly routine for an internally routed frame.
But as I took off the existing Profile Design bars and prepared to mount their replacement, the Devox bar had me scratching my head. There was a piece of cable housing that went from the pursuit ends and out the back of the bar. What good would that cable housing be?
Then I figured out what Felt had in mind. This was just a way to fish a cable through, which I did. Then I fished the cable through a proper length 5mm brake casing, then pulled the new casing into the aerobar. Everything else about that Devox went fine, but I took out the stock Devox F-bend extensions and slotted in some Blackwell Wrist Reliefs.
Nothing wrong with the Felt extensions at all! The shape is well thought out. But I knew I was going to clamp on a bottle holder, and I decided I'd rather pinch that down on an aluminum extension, rather than risk crushing a carbon tube. Plus, I'm just partial to Wrist Reliefs, on any bar where the pad is close in height to the armrest.
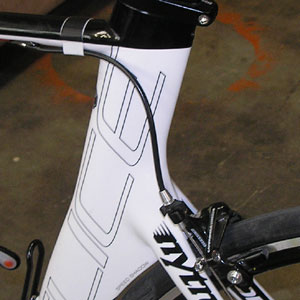
I did change the brake calipers. This course has 42 turns, and I don't know how many will require braking. I'm a fan of good brakes in cases like these. They'll actually help you go faster, if you know that you can brake a little later, keeping your speed up prior to the turn. Nothing against the SRAM Rival calipers, it's just that I don't have a "personal relationship" with them and I don't have time to generate one (the race being a week and a half out). So, there's a set of Campy Record calipers on this bike now.
I noted on Cyclingnews that James Hwang identified an alternative cable route for this Slice's rear brake cable. I'm open to the idea, especially because the Liquigas Slices use the same brake caliper I've chosen. But, the already-long cable routing seems a little meandering to me. I decided my cable should not take the scenic route, but I did fasten it adjacent to the frame with some plastic tape.
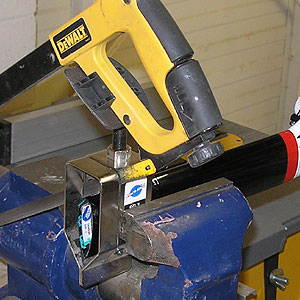
The seat post bottomed out into the frame at a saddle height slightly taller than I ride. Park Tool makes a nifty miter block that's made for aero and other strange shaped tubes. I recommend this tool, for more than just bike maintenance. It's a great mitering tool for anything and, heck, it works for round tubes as well.
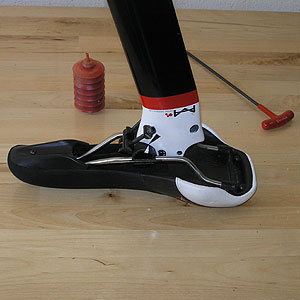
I have one, and only one, beef with the Slice, as regards this build. I had a devil of a time getting the saddle to sit level. This, because the seat post mechanism uses knurled surfaces that act as a keyway, and, adjacent notches pointed the saddle too low or too high. There are two half-round pieces that make up the mechanism, very much like an old school Control Tech post. Only one of these is knurled. So, I exchanged the upper half-round piece for the lower, and now each knurled surface contacts a smooth surface.
Will this cause the saddle to slip when I'm riding? We'll see, and I'll report back.
I took a piece of white plastic tape, and a piece of black tape, and cut little arrows, placing them on the post, so that I could adjust the darned thing with some sense of what I was doing. It would be nice if Cervelo, Cannondale, and other companies figured out some sort of increment gauge when seat post hardware gets rotated inside the post, so you can see how much you're changing the rotation of the saddle.
I've got two bottle cages on this bike, because I've got to train with it. The seat tube cage will come off for the TT. Right now, in this seat tube bottle will go my spare tire stuff, and a multi tool. Between the armrests will go my water bottle for drinking. Will I race with a bottle here? I don't know. It depends on how hot it is for the TT. If it's hot, I'm racing with the bottle. This bottle sits on its side, of course, and I drill a hole into the side of the bottle, and in this hole I stick in a stiff vinyl tube. It's my low-tech drink system. Low tech, yes, but it works fine, as long as I can get by with one bottle.
If I decide not to ride with a bottle, I'll take the cage off and leave the bracket.
I am not done building this bike. It's ready to train on now. But, the bike is neither race ready, nor have I finished making it "mine." It's currently got 175mm cranks on it, and while I ride a road race bike with cranks this length I won't TT with these. I've got some FSA cranks in 110mm bolt pattern in 170mm length that'll go on here, and my only regret is that these are not BB30 cranks. Cannondale pioneered bikes with larger diameter bottom brackets, and I think it's one of the better ideas Cannondale employs in its frames. Alas, tho, I have no BB30 crank in the length I want to ride, so, I'll put in an insert that converts the Slice's BB to a standard English 68mm BB, and that's what I'll use.
I have another idea I'm tinkering with that's specific to drive train, but, I'm not going to write about that yet because I don't know if what I have in mind will work on this bike. I'll report if it does.
Depending on the rings I choose I might want to swap the 11-25 cassette on this bike for something with a closer ratio. The fact that the cranks I'm choosing are built in a 110mm bolt pattern gives me options.
I've got one more report to write, showing this bike race ready. At that point I'll discuss race gearing, and wheel and tire selection.


