Saving Face, or How I Learned To Stop Worrying and Love My Brakes
Do your disc brakes rub, ping, or squeal? Do you find it impossible to adjust them properly?
If so, we might just have a solution for you.
We’re going to focus on flat mount brakes, as that format has become essentially ubiquitous on the tri/road/gravel frames of this current generation, but the general principles we will talk about apply to all disc brakes.
In order to function properly, a disc brake needs to be set up so that the pads are at the correct height for the rotor size chosen, are laterally aligned with the rotor, and move in the same plane as the rotor, which should be perpendicular to the hub axle.
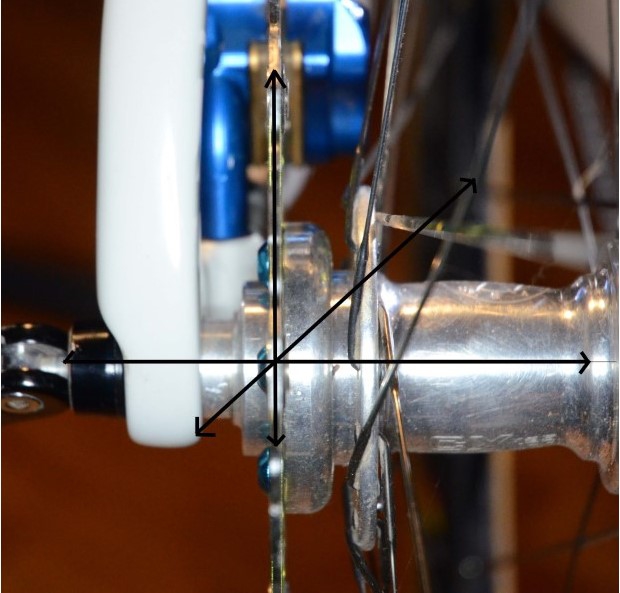
We use adapters to adjust for the different rotor sizes/heights, and – thankfully – this doesn’t have to be perfect. When it isn’t you might notice a little bit of material at the top of your brake pads that doesn’t wear away as the rest of your pad does.
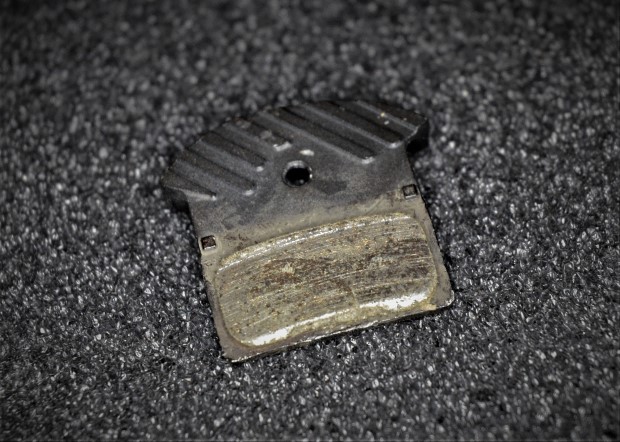
If your pads look like the one in the pic, it means your brake is mounted high relative to the rotor. The amount shown in the pic is pretty typical. Any more than that, and you should do something about it. That “something” is… complicated. More on that in a bit.
Lateral alignment is fairly simple, until it’s not. There is a certain degree of adjustability built in to the brake mounting hardware so that you can vary the lateral offset of the brake, and match the angle of the brake mechanism to the rotor.
In the rear, the brake mounts on the frame are elongated ovals.
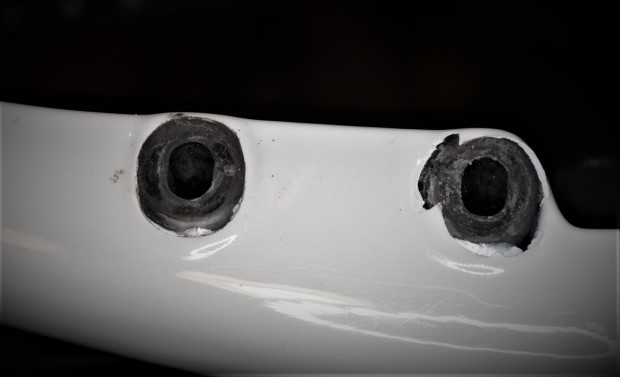
The brake bolts slide from side to side inside these slots, and you clamp the whole thing down when everything is positioned correctly.
In the front, the slots are in the brake itself, the bolts are fixed in place in the frame, and the brake moves around them, once again being clamped in place once alignment has been achieved.
There’s limit to the adjustability this system affords, as It’s bound by the length of those slots. As limited as this range is, it should be plenty. If it isn’t, either your frame is out of spec or (perhaps more likely) your wheel/rotor is. For the nerdiest of us, an excellent breakdown of the technical specifications can be found here.
That covers vertical and horizontal alignment, and we’re left with angular alignment.
In theory, your brake rotor is mounted perpendicular to the axle of your hub. The plane of the rotor path is at a perfect 90 degree angle to the hub center. Your brakes need to operate in that same plane.
With old-style post mount brakes, there is a little bit of wiggle room to adjust the brakes so that alignment in this plane is correct. There is a little spherical washer set that goes between the post and the brake, and the brake pivots ever so slightly upon this until you tighten things down. You get maybe a couple of millimeters of adjustability out of this system, and that’s generally just enough to square things up.
Flat mount brakes don’t have any such adjustability. They rely entirely upon the (nominally) flat surface they bolt to being put in exactly the correct alignment by the frame manufacturer.
Perfection is a very rare thing. Even very high-end framesets from well regarded manufacturers can be found with brake mounts that are out of spec.
If your brake pads look like this…
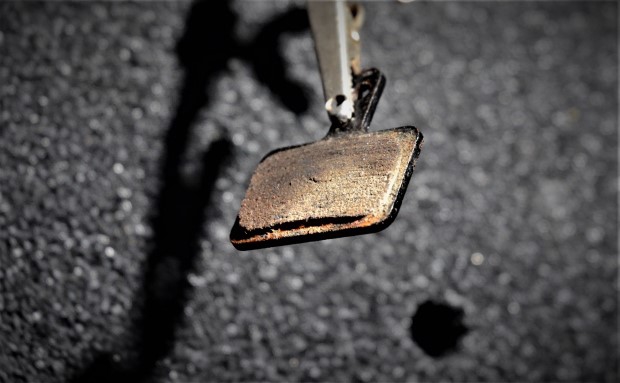
…with the pad wearing asymmetrically or at an angle, or if you simply cannot get your brakes to set up without rubbing or squealing, or – and this is the big tipoff – if every time you try to adjust your brakes, just when you think things are perfect and ready to go, you apply that final bit of torque to the bolts to snug things down to spec only to find that the darn rotors are suddenly rubbing… if any of this sounds familiar, odds are your brake mounts are out of alignment.
Fortunately, there is a solution. You can grind those recalcitrant mounts into submission using a disc brake mount facing tool.
While it seems very clear that most people (even many bike mechanics) have never heard of these tools, they have been around for just about as long as disc brakes have been on bikes. This is the Magura Gnann-O-Matt Disc Optimizer, and being 20+ years old, it pre-dates both flat mount and post mount brakes, and is designed to “optimize” I.S. mounts on bikes with quick release dropouts.
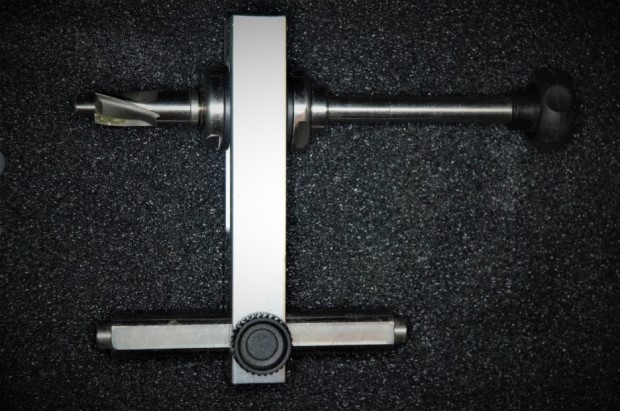
You almost certainly have none of those things on your bike, so we’re going to have to use something a bit more modern. We’re going to use the Park Tool DT-5.2. The “.2” part of that name is important. If you’re going to buy one of these, you definitely want the 5.2. The DT-5 won’t work with flat mount brakes, it’s post mount only.
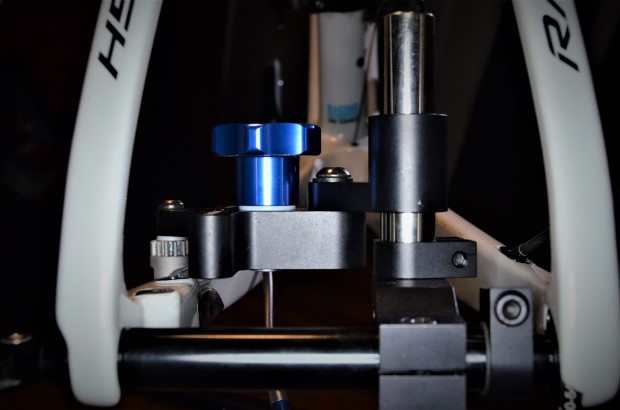
In theory, the operation of the DT-5.2 is fairly simple. An adjustable rod is placed in the dropouts of your frame/fork, where the hub would ordinarily sit. A vertical rod bolts on to this surrogate hub, and an articulated arm slides up and down on the vertical rod. At the end of the articulated arm is a rotary cutter head.
To index the cutters, you push two little plugs into the brake mount holes and drop the arms of the cutter head down on to the posts.
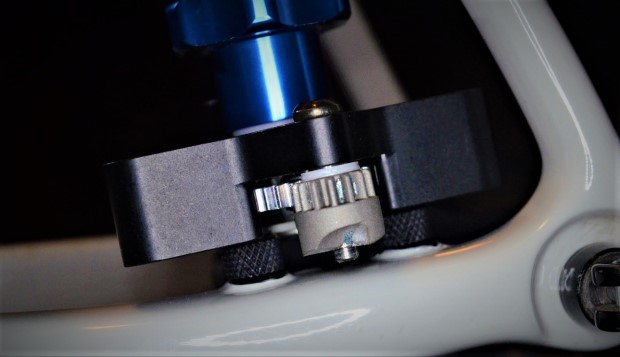
You hold the cutter head in place with your hand, then fix the vertical rod in place.
Now that you’re aligned, you remove the plugs, place the nub on the end of the cutter head inside the brake mount hole, and tighten down the articulated arm.
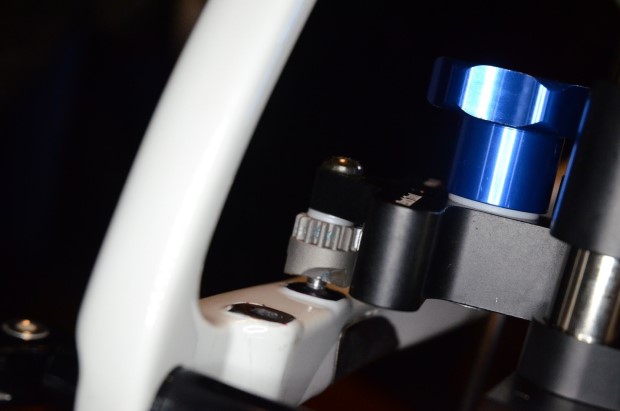
There is only one cutter head, so you need to move it between the two mounting holes, relying on a (non-indexed) collar that bolts to the vertical rod to keep the depth of cut consistent. Before cutting anything, you will want to figure out which of the two mounting slots is lower by measuring the gap on the vertical post.
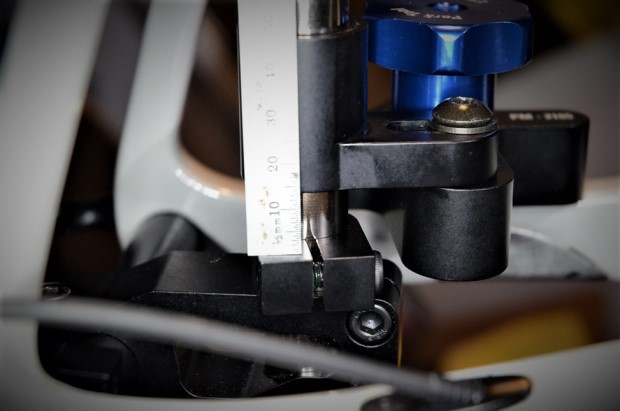
You should first cut the lower of the two mounts, as both mounts will need to wind up at the same depth.
To cut, simply turn the blue knob. You’ll want to cut until enough of the surface is level to ensure stable contact when the mounting bolts are tightened down. I “blued” the surface of this mount with a paint pen so you can see what it looked like after the first few passes of the cutter…
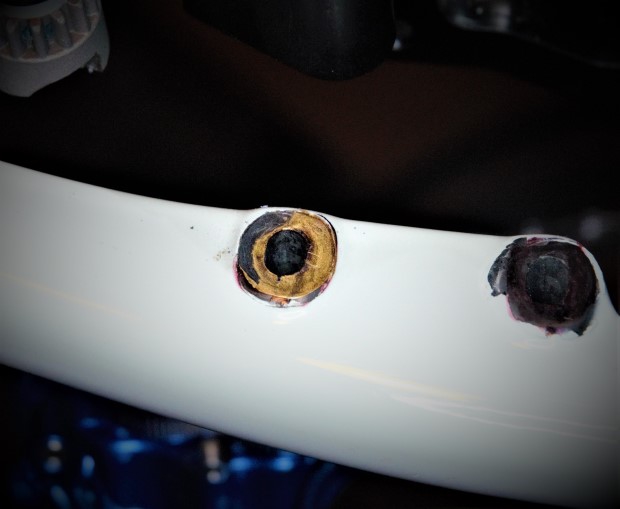
…and when level. Ish.
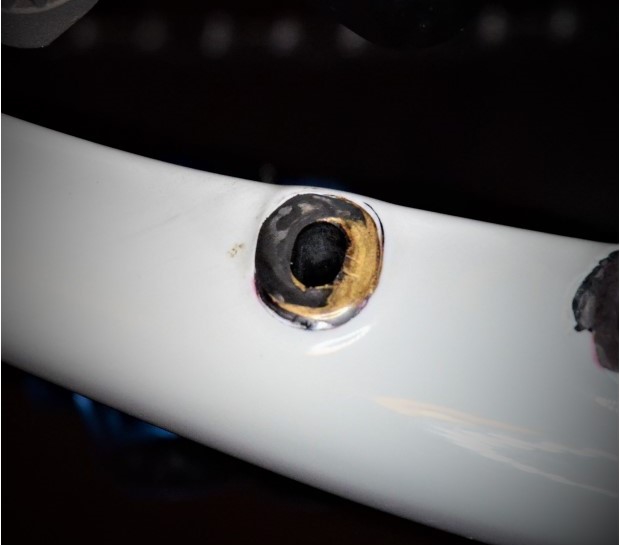
This is the point at which I stopped. Why?
There are two mounting points. This was the higher of the two, and at this point I had reached the level at which the first mounting point was faced level and true. If I went any farther on this one, I would need to go back and re-cut the other. This is also sufficient surface area to be stable. Barely, but enough.
Most importantly, though, remember this picture?
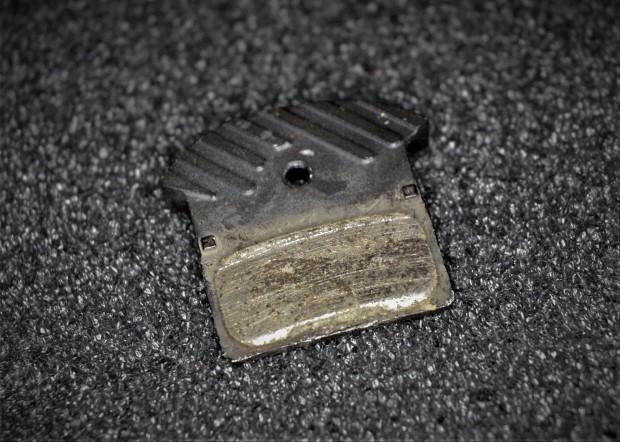
This is what it looks like when the brake is sitting higher than the rotor. The solution to this problem is face/cut the mount deeper so that the brake sits lower.
With the one that I’m working on here, though, I’m approaching the opposite end of the spectrum. If I go much lower, I’m going to need to shim the brake up in order for it to contact the brake rotor correctly. So, good enough is good enough.
It should be pretty obvious from that first picture why it was more or less impossible to adjust the brakes on this bike. The mounting hole to the right was lower than the one on the left, and the brake was only making contact from about 9-12:00 on the left hand mounting surface. Every time this brake was tightened down, the brake would slide ever so slightly counterclockwise and down, taking the brake out of plane with the rotor. As a result, the brakes always rubbed ever so slightly, they pinged with most rotors, and they squealed if there was even a hint of moisture in the air.
After I completed this process, I bolted everything back in place and it’s like it’s a different bike. Brake adjustment takes seconds, the brakes don’t squeal anymore, and a (frankly) unpleasant setup has become one that is a pleasure to work on and to ride.
Based on personal experience and an informal survey of working bike mechanics, very few bikes have their brake mounts properly faced at the factory or at point of purchase, and a huge percentage of the problems that people commonly encounter with their disc brakes can be at least in part addressed via this process.
This isn’t rocket surgery, but it is a bit much for the average home mechanic. You want to have the process down pat before you even think about mounting a cutting tool on an expensive frame, and the list price of the Park DT-5.2 is $469.95. Those two things combine to put this pretty squarely in “contact your local professional bike mechanic” territory.
I’ll go one step farther than that. Not only should you probably contact your local bike mechanic if you think you might need this service, if this isn’t a service your bike mechanic offers you might just want to find yourself a new one that does.


Start the discussion at slowtwitch.northend.network