Zipp’s new Vuka Clip
Ergonomics are underappreciated. But not among the prophets! "Comfort, yes, comfort My people!' says your God.” Isaiah 40:1. Look it up.
Isaiah wasn't just your garden variety writer of scripture. He was a prophet. The prophet's job is to exhort, reveal, predict, so when he urges you to be comforted you should sit up and listen. (Well, not literally sit up; that's actually the problem: too many of you are sitting up, because you're uncomfortable in your aerobars.)
Be comfortable, my people! For you who scoff at the idea that I’m your triathlon equipment prophet, nobody liked Jeremiah very much either. Selah.
I wrote last week about Profile Design’s new aerobars, which I consider terrific. They’re not only an improvement on its already world-leading products, they represent – I hope – an opportunity for PD to streamline its offerings.
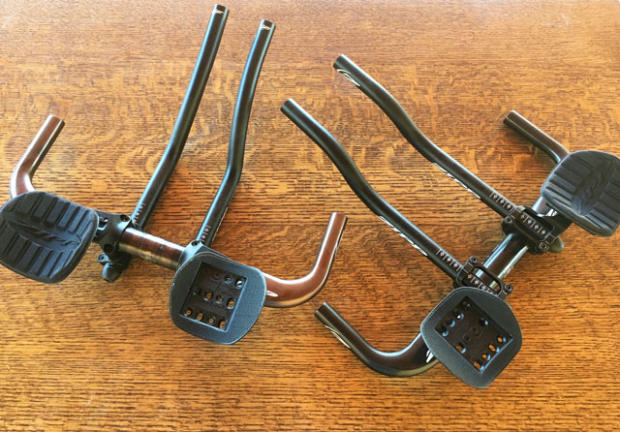
I think we’re finally getting to a point of consensus and orthodoxy about how the best aerobars should be made and I say this because PD and Zipp share a lot of features in common. Both sit in a class above most of the aerobar makers. (There are 2 or 3 other aerobar makers that also deserve mention). What I’ll write about here are Zipp's aerobars released in May of 2017. Here are the differences between the old Zipp Vuka Clip and the new:
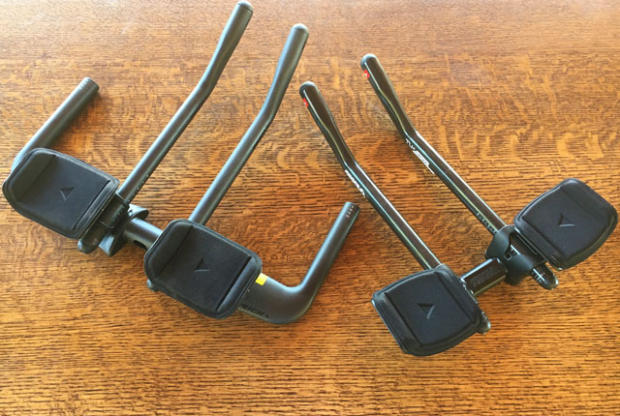
1. Below is an image of the old next to the new Zipp Vuka Clips. The old is on the right, and you’ll see that there’s a clamp inside of a clamp through which the extension runs. This was an ingenious, but quite complicated, method of selling you one bar that could be configured as either an Undermount or Overmount (I’ll get to what that means). The new bars decouple these two mount paradigms, and you either buy the Zipp bar as an Overmount or an Undermount. If you see a clamp like the one on the right, don’t buy the bar. That’s an outdated bar and there are many things about the new bar that are better than the old.
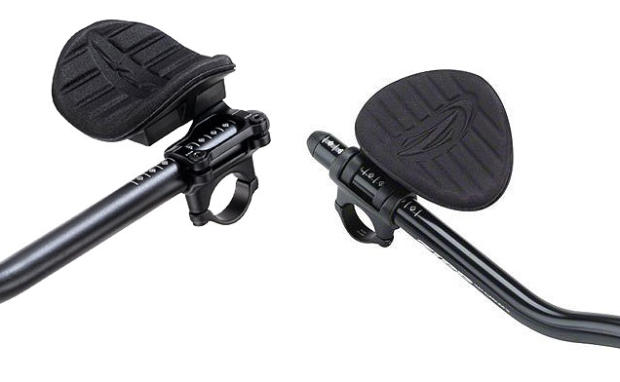
2. Not a major point, just, a point of differentiation between the old and new are the leading and trailing edges of the armrests, which are squared off. This makes it a little harder (thankfully) to smack the armrest with your knee when out of the saddle. You can see the difference in the image above, right?
3. The biggest problem with the old Vuka Clip was the Act of Congress it took to adjust the bar. No longer the case. Now it adjusts very easily and quickly, and I mean adjustments in all axes: high, low, narrow, wide, extensions shorter or longer, pads forward or rearward.
4. The second biggest problem with it was the inability to widen the armrests sufficiently. Many riders required the use of an aftermarket pad extender. That has also been solved. The new brackets for both Undermount and Overmount allow for a wide pad placement. Pad width can adjust from 140mm on center to 280mm on center and if you need more than that you should be a discus thrower.
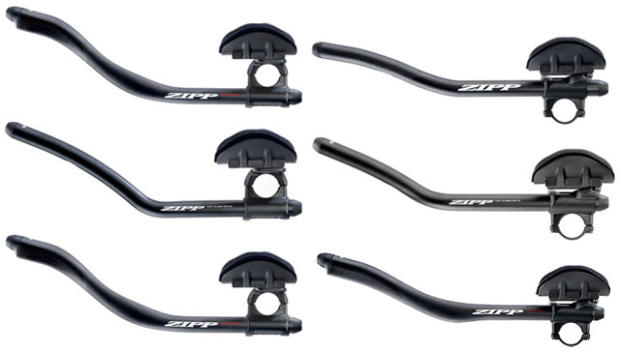
5. Lots of extension shapes, for both Undermount and Overmount. This is important, and it’s important to choose that shape wisely. Undermounts mean the extension and the armrest are separated by the pursuit bar. This adds significant elevation difference between those two elements. When you lay your forearms flat on the armrests you need to reach out and find an extension end ready to great your hand. An Undermount config means the extension needs to reach up to where your hand is. Look at the 6 options above, and note that the extensions for the Undermount rise steeply to meet the hand.
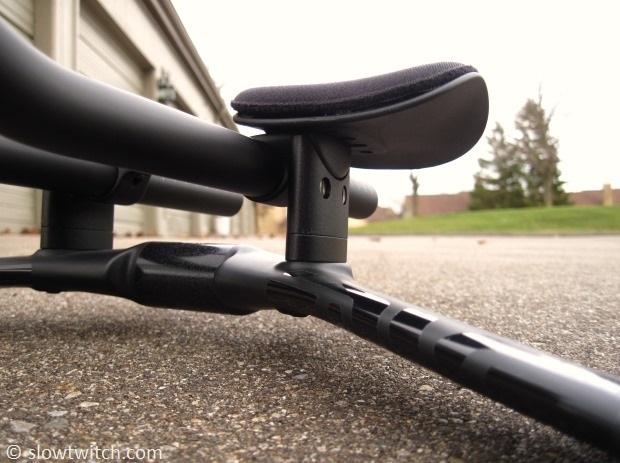
If you look at the clamps below, from the underside, you can see the many fore/aft and in/out pad mount options. Zipp’s bars may not offer the fine increments between one setting and the next that PD offers, but the range is sufficiently large as to sit alongside PD in adjustability in all 3 axes (fore/aft, in/out and height of pedestaling). The center of the armrest can sit either 50mm behind or 50mm in front of the pursuit bar center. If you need more than that you either need a different bike or a new bike fitter. The Undermount option is not quite as adjustable but still is quite rangy, with a +/- 37mm pad center versus pursuit bar center.
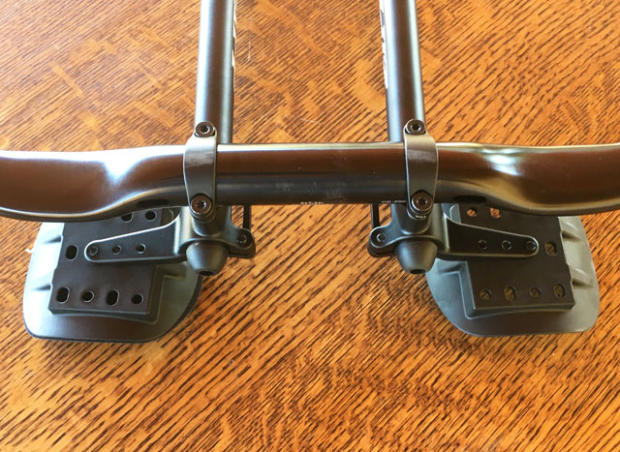
The pads can be pedestaled 50mm which, again, is plenty. Zipp also allows for a lot of pedestaling without requiring the use of a bridge, which is important if you don’t want a bridge to foreclose on the hydration scheme you had in mind.
And finally, just in case you don’t understand the terminology by now, Overmount means the extensions sit above the pursuit bar, and the pads sit above the extensions. The whole complex is stacked in that order. Undermount means the pads sit right on the pursuit bar and the extensions are underneath the pursuit bar. What’s the difference? If you need a low position you choose Undermount, because the tops of the pads sit 37mm above the pursuit bar center. The traditional Overmount position has the pads sitting 60mm above the pursuit center. The one adjustment advantage of Zipps over the new PD bars I wrote about last week is that PD doesn’t offer a pad that sits that low in elevation except in some older bars that don’t share the new tech PD is now making.
The Zipp system costs $250 for carbon extensions and $140 for aluminum, pretty close to what Profile Design is going to be charging for its new system. Zipp’s pedestals are offered separately for $25 and I don’t know whether that’s the case for PD’s pedestals. (I’m sure in the reader comments below this will be addressed).


Start the discussion at slowtwitch.northend.network