Dropout and Hanger 101
Strap yourself in for the most exciting discussion since high school algebra class. I’m sure this topic has captivated at least tens of cyclists in the history of the world… count me as one of the rare few. With any luck, we’ll make this at least twice as exciting as you expect (which is to say – still not very exciting).
Introducing the fabled – the famed… Dropout and Derailleur Hanger 101.
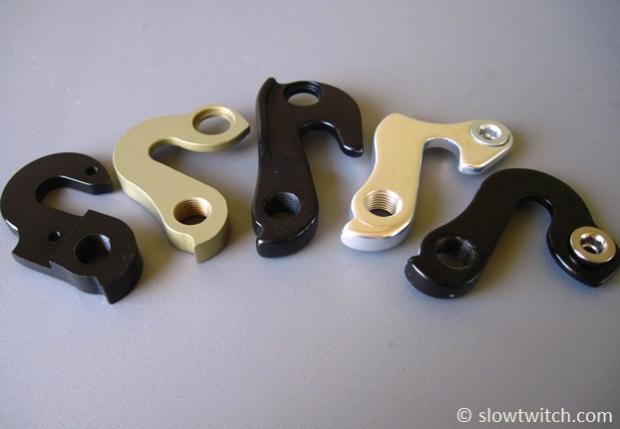
For those not up-to-speed on their bicycle glossary of terms, dropouts are the two small notches in the rear of your bike in which the rear hub rests. Put even more simply – it’s where your rear wheel goes. Modern bikes usually rely on a quick release skewer to clamp the hub in the dropouts, and voila – you can roll around on your bike (I’m taking the liberty of assuming you have a front wheel in your fork dropouts, too).
The derailleur hanger is a simple tab – an extension of the right dropout, if you will. This tab has a hole which your rear derailleur threads in to.
The photo below shows a very simple and typical set of dropouts, from my Habanero titanium frame:
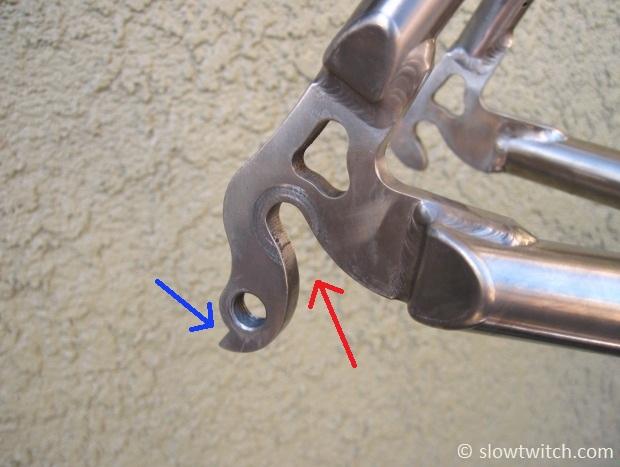
The red arrow points to the opening of the right dropout (you can see that there is an identical slot in the left side dropout – in the background). The blue arrow points to the derailleur hanger. More specifically, it is point at a critical part of said derailleur hanger. The flat area at the bottom of the hanger is where your derailleur’s B adjustment screw rests. If you thread this screw in, the derailleur rotates to create more space between the upper pulley and cassette cogs. If you unthread the screw, the gap shrinks.
Note: I don’t think there is any real way to define where the dropout ends and the hanger begins. They are both part of the same whole. You just need to generally know what they are.
What could be so complicated about dropouts and hangers? For one, there are many different designs. The more important (and more cryptic) part is that there are a host of unofficial specifications for these items – which not all frame manufacturers adhere to. Sometimes a rear shifting problem has nothing to do with the derailleur, chain, cable, or cassette – but rather, a poorly designed or out-of-spec hanger. Or dropouts that aren’t straight. Or dropouts that are too thin. Or… (insert problem here). There is more going on than meets the eye. Let’s take a closer look, shall we?
Dropout Styles
To really have a productive discussion, we need to understand the different styles of dropouts. This graphic is from the late, great, and legendary bike genius – Sheldon Brown:
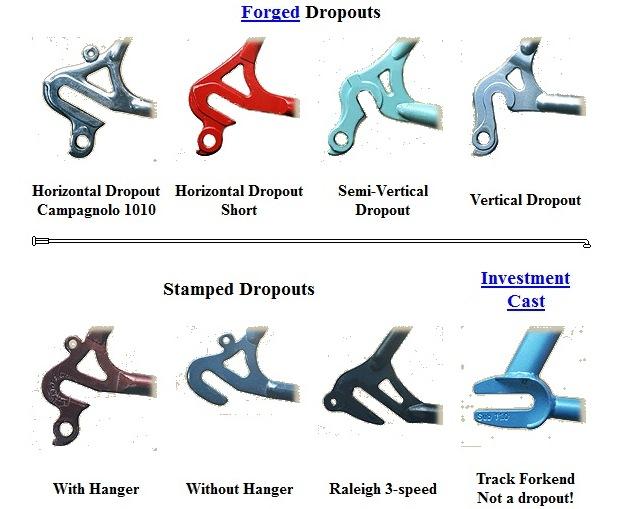
Early derailleur-equipped bicycles had long slotted horizontal dropouts (on the left side in the photo above). These all but disappeared in the 1990’s, as the vertical dropout (top right) emerged victorious. Even more recently, a hybrid design debuted, made popular by the likes of Cervelo and other triathlon-focused brands. Many folks call this a horizontal dropout, but that isn’t entirely correct. Something like “track fork end with a derailleur hanger” is more accurate – and a mouthful. The wheel doesn’t actually drop out of anywhere – you pull it from the rear of the bike. For simplicity’s sake, I will call these fork-ends-with-a-derailleur-hanger a “horizontal dropout”. It’s what the rest of the industry has decided on, so we’ll go with it.
What the purpose of the new-style dropout? Some manufacturers say that our bicycles ought to have a very small gap between the rear tire and seat tube for superior aerodynamic performance. Most of these horizontal dropouts have small screws in them that allow the user to micro-adjust the fore-aft position of the wheel. If you use a 23mm tire, you should thread the screws in further than you would with 25mm tires. Easy, no?
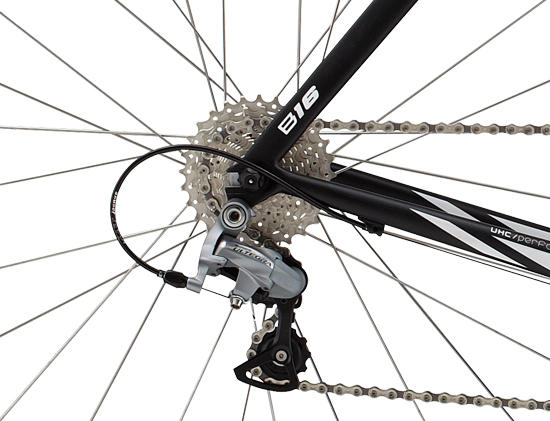
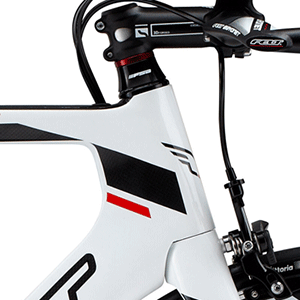
Here’s a shot of those new-fangled horizontal dropouts, on a Felt B16:
Wheel Installation
The only real hitch to understand with these different styles of dropouts is that it affects the method you use to install or remove your rear wheel. In my opinion, vertical dropouts win the simplicity battle. I’ve installed and removed wheels from these dropouts a million times. It’s so easy an insurance-selling caveman could do it. The real advantage is the ease with which you can install the rear wheel straight in the bike. Put the bike on the ground, loosen the rear quick release skewer with your left hand, push down on the saddle with your right hand (forcing the wheel evenly in to both dropouts), and close the skewer lever.
Horizontal dropouts require that the wheel be installed from the rear. It is possible to do this without touching the chain or getting greasy, but it requires practice – and is made easier if you completely remove the rear skewer. If you do have a bike with adjustable horizontal dropouts, you must push the wheel forward with your right hand, and then close the skewer lever with your left hand. If you do not apply forward pressure, you risk installing the wheel crooked. It should also go without saying that the left and right adjuster screws must be appropriately positioned for a straight wheel. While it sounds simple, I can’t tell you how many times I’ve seen horizontal-dropout-equipped bikes with crooked rear wheels. Even if you haven’t taken your rear wheel out in months, it is a good idea to check it. Adjustment screws move, your quick release skewer might not be as tight as it should be… and maybe your rear wheel isn’t as straight as you thought it was.
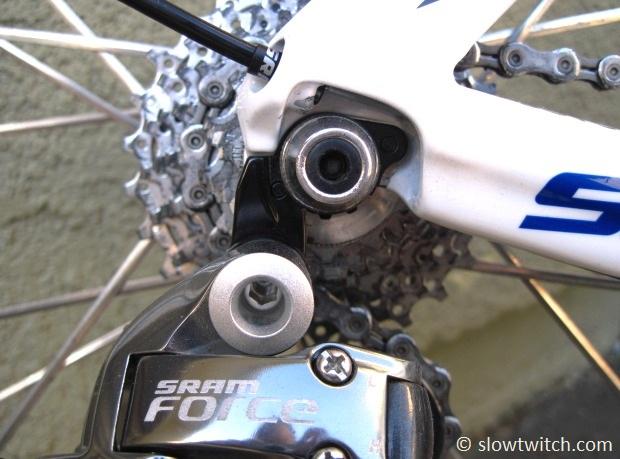
Trek still relies on simple vertical dropouts for their time trial and triathlon bikes, seen here on the Speed Concept:
To replace, or not to replace…
…that is the question that Hamlet didn’t ask (but I am). Regardless of whether your bike has vertical or horizontal dropouts, there is a completely separate consideration. Should dropouts use a fixed or replaceable derailleur hanger? This is an issue because derailleur hangers can get damaged or bent from things like crashes and air travel (NOTE: Always, always, always remove the rear derailleur when you put your bike in a travel case – not doing so is the #1 cause for damaged derailleur hangers, based on my own unscientific research).
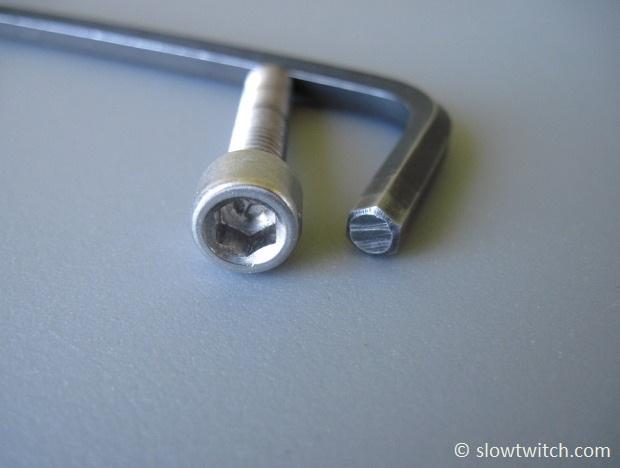
Which is better? There are pros and cons for both. Non-replaceable hangers tend to be stronger. They are usually one big chunk of material. My non-replaceable Habanero titanium dropouts are 7mm thick, and water-cut from a solid plate. In layman’s terms – they’re really beefy. The other nice feature of titanium is that it’s springy. If I somehow manage to bend the hanger, I can very likely bend it back with one of these:
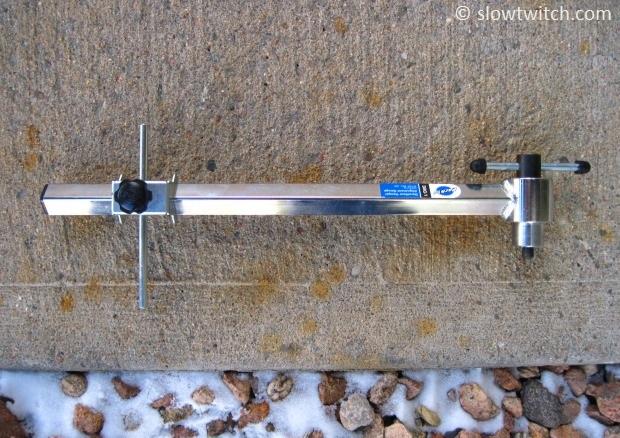
However, if damaged badly enough, there is no real fix. Some titanium frame manufacturers can cut off the old dropout and weld a new one on. If your frame is made of carbon, however, you’re usually stuck buying a complete new frame.
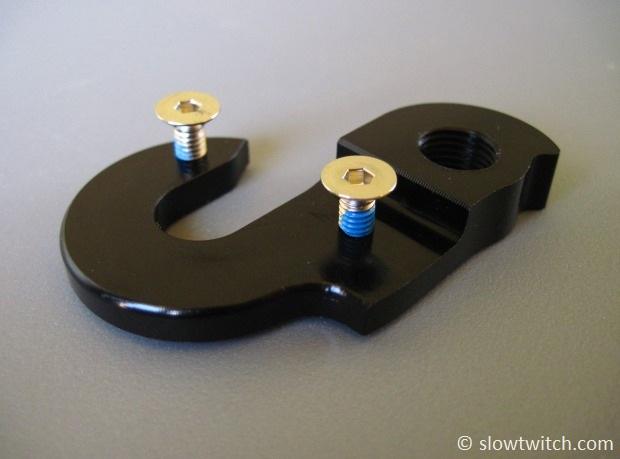
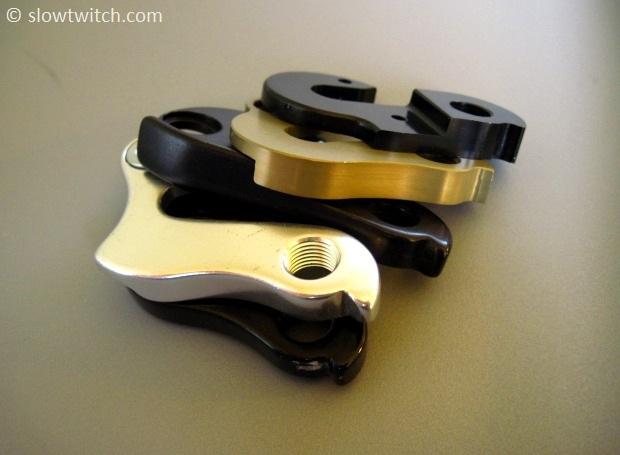
So that means that replaceable hangers are always better, right? Yes and no. Smart designers of replaceable hangers make them out of material that is softer than the frame (so the hanger bends before the frame does). They usually attach to the frame with one or two bolts. Some use a chainring nut, and others use small bolts that thread in to the hanger itself (so if you strip one out, you can replace the hanger – and not the frame). A good example of the latter is the spare hanger for my Niner mountain bike:
The downside to replaceable hangers should be obvious. Instead of having one piece of material that is, say, 6 or 7mm thick – you have two pieces of material that are 3 or 4mm thick (the frame dropout, and the hanger that attaches to it). Thinner material usually means that the halves are weaker and more prone to damage. Additionally, if your derailleur hits something hard enough, there is still a chance that the frame sustains damage along with the replaceable hanger.
I’ve also had several people suggest that replaceable hangers aren’t as stiff and reduce shifting performance. This claim has come to me from frame manufacturers, component manufacturers, and mechanics. I don’t claim to hold the absolute truth of the universe, but I don’t quite buy their argument. Maybe there is a teeny, tiny difference. Personally, I’ve never – not once – noticed a bike that shifts worse because it has a replaceable hanger. There are way too many other factors and cooks in the kitchen. How straight is the hanger? Is it within the length and thickness specifications? What is it made of? Are the dropouts straight? What brand and model of derailleur and cassette are on the bike – and were they installed correctly? What condition are the cable and housing in? What brand of chain – how is it lubricated – and how old is it? The list could go on. I’m not necessarily arguing that replaceable hanger-equipped bikes shift better than those with fixed hangers – only saying that I think this part of the discussion is missing the big picture of everything else that affects shift performance. Horse first, then cart.
Real-World Examples
As part of my research for this article, I wanted to find out what the manufacturers say. Some seem steadfast in their support of fixed hangers. Others support replaceable hangers. Quintana Roo takes the replaceable idea to the extreme. Not only do their bikes have replaceable derailleur hangers – both the entire left and right dropouts are replaceable:
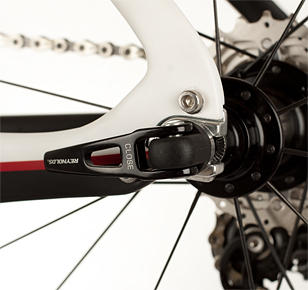
They sell a replacement kit that looks to be very sturdy:
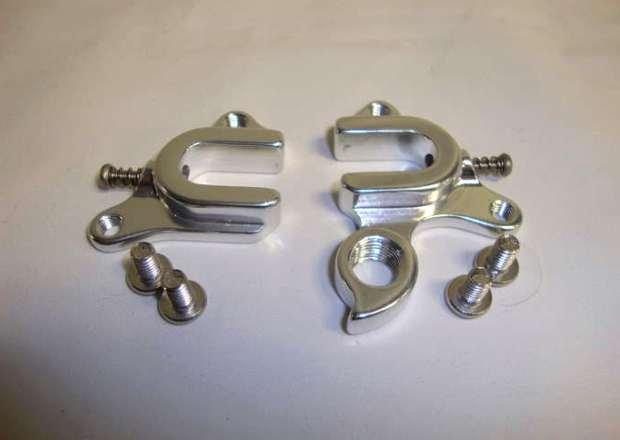
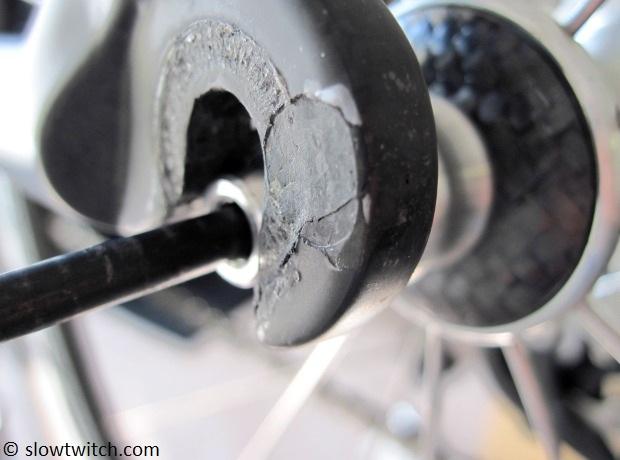
While that may appear to be overkill, one of my personal bikes – a carbon road frame with carbon dropouts – showed up one day with a cracked left dropout (see photo below). It sure would have been nice to bolt a new one on… but I had to replace the entire frame.
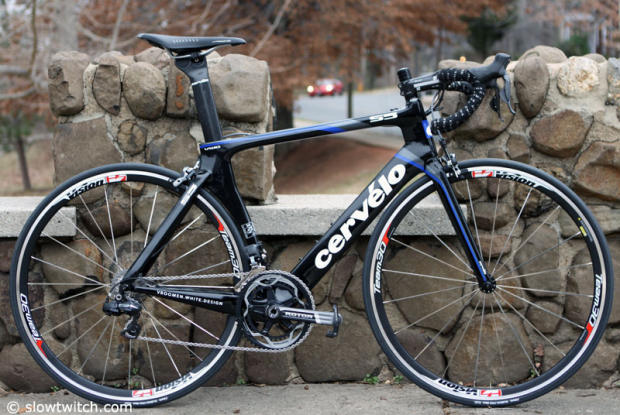
Canada-based Cervelo takes a different approach. Their P-series of bikes (P2, P3, P5) feature horizontal, non-replaceable dropouts and hangers. Their R and S-series road bikes feature vertical dropouts with replaceable hangers. I inquired about this with Cervelo Senior Design Engineer, Damon Rinard. He noted that both styles have their advantages – and that some people simply have their heart set on one or the other (more specifically, the road market tends to favor replaceable hangers).
This 3D drawing shows the latest dropout from the S5 VWD (sans hanger):
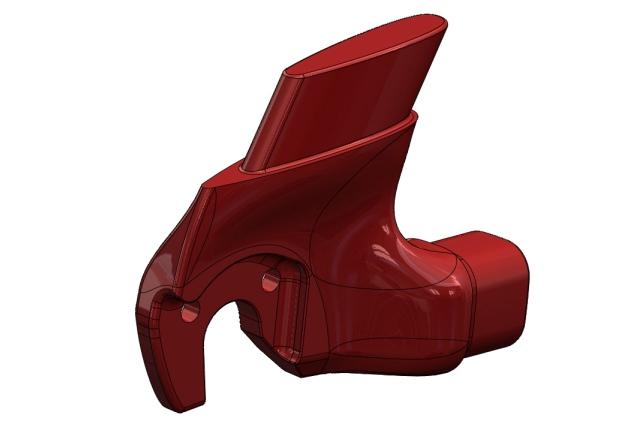
According to Rinard, the P-series hangers are stronger than the road frames, due to the shape and amount of material they can use. While he didn’t provide an exact number, Rinard mentioned that Cervelo replaces substantially more road-style hangers than P-series frames from dropout damage. The new P5 uses a second generation dropout that is about 15 grams heavier than the P2/P3 dropout, and even stronger. That’s weight well spent, if you ask me.
This image shows one of Cervelo’s derailleur hanger test machines. As you can see, the dropout gets bolted down, as though there was a hub clamped in it. The cylinder presses down from above, simulating the force that a bike would see in a right-side crash or bike travel case.
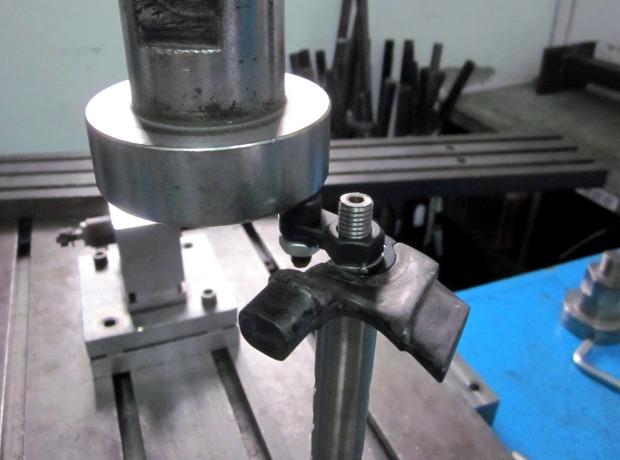
Cervelo claims that their dropouts are somewhat unique in that they meet all specifications for Shimano, SRAM, and Campagnolo components. If you use a wheel that is also within the specifications, you can hit all gear combinations without frame or spoke interference. While this may sound rudimentary and obvious (and you may assume that all manufacturers do it) – not everyone does their homework. You can run in to problems with special setups like junior gearing – which may have a 13 or 14 tooth cog as the smallest cog. If the dropout was only designed with an 11 or 12 tooth small cog in mind, you can run in to trouble.
Take-home thoughts
What can we all learn from this? All of the information is great, but ultimately we’re limited in the action we can take. If your bike came with a replaceable hanger and you’d prefer a fixed one, you can’t magically change it. All you can do is vote with your purchasing power next time you get the bike buying itch. The point is more to educate those unaware of the topic. If nothing else, this might lead you to check how straight your rear wheel is sitting in your frame, and perhaps diagnose that clicking rear derailleur – it could very well be that the hanger is bent.
Whether you like horizontal or vertical dropouts is up to you. I’m mostly agnostic on the topic. I like vertical because they’re so easy, but I understand the argument for horizontal. Regardless of that aspect, in the replaceable vs. non-replaceable battle, I have to give the nod to replaceable. I’m not worried about big damage – if it’s bad enough, it will trash either style of frame.
I’m concerned with the little things. The ‘oops’ when your bike gets knocked over at the coffee shop. The cross-threaded rear derailleur main bolt. The dropout or hanger that got marred or scratched from travel or the repeated installation and removal of wheels.
To illustrate why I prefer replaceable, here is my N = 1 history of hanger and dropout damage:
1. Titanium mountain bike with non-replaceable hanger. Hanger got bent in travel, and I bent it back with a straightening tool.
2. Aluminum mountain bike with replaceable hanger. I slid on ice and bent the hanger. Replaced it with a new hanger.
3. Replaceable hanger on a brand new aluminum frame in the box – damaged in shipping from the manufacturer to me. The company sent a new hanger.
4. Hairline crack in left dropout on a carbon road frame (unknown how it happened). Replaced the entire frame.
The first situation was the only one that could realistically be ‘saved’. The second and third required new hangers – a relatively easy fix. The last one called for a complete new frame. Granted it was covered under warranty, but it still took an afternoon of time to transfer all of the parts over to the new frame and cut the fork steerer tube. Not to mention I was without a bike for several weeks while I shipped the old frame back, they evaluated it, and finally shipped a new one to me.
What do you think? Do you prefer fixed or replaceable? Do you have any hanger ‘horror stories’ or tall tales? Would you rather watch paint dry than discuss this? Whatever the case, we’d love to hear your comments.


Start the discussion at slowtwitch.northend.network