The Uber Training Bike
I’ve been accused of being overly pragmatic when it comes to my bikes. Too basic, too utilitarian, and too grumpy. While I won’t argue the grumpy part, I’ll only accept the rest after a qualifier. I want very basic and utilitarian equipment only insomuch that it gives me ability to train, recover, and enjoy my life. I don’t want basic equipment just for the sake-of. I am certainly open and accepting to advances in technology and things that make me faster – just so long as the cost in complexity does not outweigh the benefit. In my personal and humble opinion, if it’s so complicated and has such time-consuming maintenance that it’s costing me sleep – it’s actually slowing me down on race day (and making me even more grumpy). I want fast and happy.
In the past, I’ve written various things about what I consider to be pieces of equipment that fit my criteria – bikes, wheels, tires, and the like. There was an editorial piece which I found particularly fun to write, and also put a wild idea in to my head (Optimized to Train).
I wrote:
“In my fantasy world, bike manufacturers will combine a triathlon bike and cyclocross bike for the ultimate training tool. Triathlon geometry, mechanical disc brakes (i.e. Avid BB7 Road – which will work with TT-style levers), fender mounts, two bottle cages, a round seat post, and clearance for 35c tires. Slap on a set of studded tires for winter, and you can train regardless of weather or geography. Why the heck not? They can match the geometry to their normal “summer” tri bike, and we’re set. Strange? Yes. Geeky? Certainly. But – you cannot argue with its utility.”
This thought must have struck a cord of curiosity, and gotten the creaky gears rolling in my brain. I thought – why not build the thing? So… I did.
What is it called? I’m not really sure. Start with a cyclocross frame, add disc brakes and 135mm rear hub spacing… throw in a dash of triathlon geometry… and even a hint of an ITU bike. It’s a Franken-bike. Or if you ask me – the Uber Training Bike.
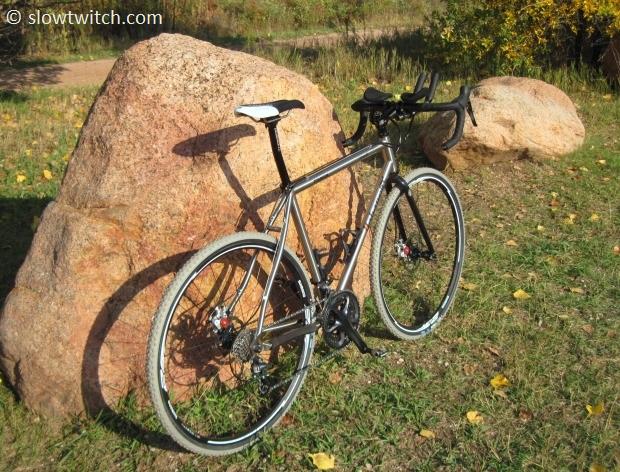
One thing’s for sure – it ain’t pretty. At least not in the same sense of all the beautiful aero-shaped carbon super bikes that are out today. No, this is pretty in a Seinfeld ugly-baby-episode kind of way. Who said an odd duck can’t be endearing? The good news for me is that as I’ve aged, my desire for aesthetic perfection at the cost of utility has dropped to near-zero.
The big motivation behind this rig was actually a simple one: Safety. We’ve had an unfortunately high number of reminders lately just how dangerous road riding can be. Lights, Road IDs, and smart training routes can help, but not cure the dangers of auto vs bicycle accidents. While I’m not suggesting that everyone quit the sport because of this, I do think that a fantastic way to limit the danger is to find alternative places to ride whenever possible (which, of course, is also entirely dependent on where you live). Now that fall and winter are upon us, many of our readers pick up cyclocross racing as a fun way to stay in shape during the off season. Others blow the dust off of their mountain bikes. I think these are great (and fun) choices. Of course, they still have their own inherent dangers; such is life.
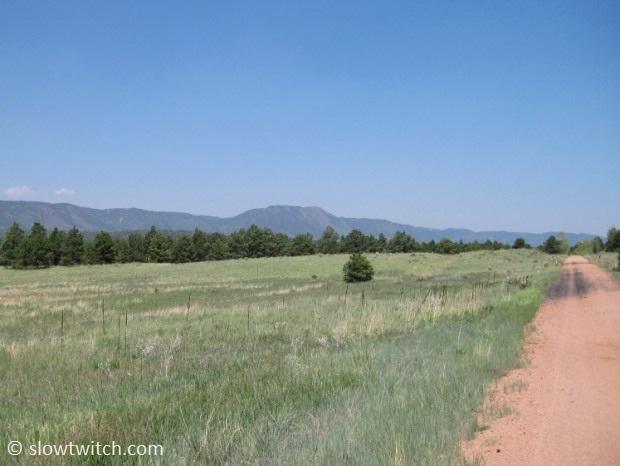
Some cities and areas are lucky enough to have extensive trail networks. For example, Coeur d’Alene, Idaho has its own 60-mile asphalt bicycle super highway. It’s made by the combination of two trails – the North Idaho Centennial Trail and the Spokane Centennial Trial. Out-and-back makes it over a century, and you can do the whole thing on your normal tri bike. I live in Colorado Springs, CO, and we have what is known as the Front Range, or “Santa Fe” trail. It’s a mixed dirt and asphalt path stretching between the town of Fountain, all the way up through Colorado Springs, Monument, and finally ending at Palmer Lake (about 35 miles total). Once you get out of town, it parallels the interstate, and you’re really out in the open. Some stretches are straight for several miles, and essentially a single lane dirt road.
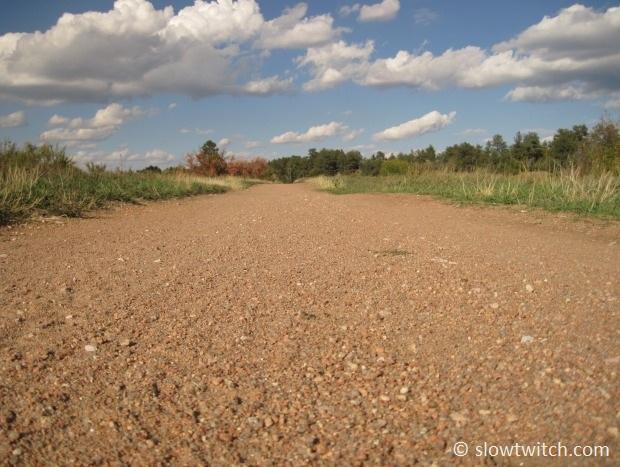
I’ve ridden this trail plenty of times on my mountain bike and cyclocross bike. Some of the more daring folks even do it on a road bike, although it can be precarious in the summertime as the sand pits get dryer and deeper. While the ‘cross bike is great, it lacks in its ability to offer “neck training”. You know that feeling after winter – when you start to get outdoors on the tri bike again, and your neck isn’t used to riding in the aero position? While this eventually goes away, I thought it would be a good idea to limit the problem. How so? Build the exact bike I did, and get some dirt road aerobar action.
This bike could also be used as a winter road bike. When I lived in the Midwest, we always would ride cyclocross bikes on the road during winter. If you weren’t sure of the road conditions, you just slap on a set of 35mm studded tires and head out. Sure, they roll really slow when the pavement is clear, but they’re a life-saver in the case of black ice and the inevitable snow drift. In general, I think cyclocross bikes make a much better “second bike” to own after a triathlon bike. Road bikes are cool, but I feel are also fairly limited in their use. You can always put a set of narrow tires on a cyclocross bike to use it for road riding, but you can’t do the opposite (i.e. wide CX tires on a road frame). But maybe that’s just me.
So what is on this crazy bike of mine? Let’s break it down.
The Frame
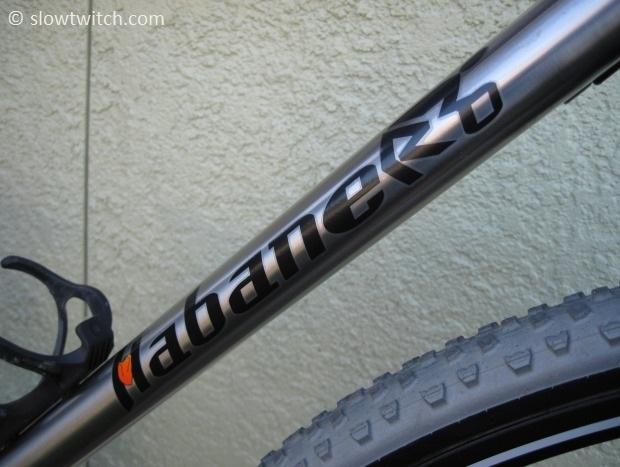
The frame is from my friend Mark Hickey at Habanero Cycles. While their standard cyclocross frame has mounts for cantilever brakes, I opted for a full-custom frame. That meant no more canti mounts in favor of disc tabs and 135mm rear spacing (to accept a mountain disc hub). The frame has a ton of mud clearance… my tires measure at 35.5mm wide and have room to spare all around.
It’s hot as a Habanero…
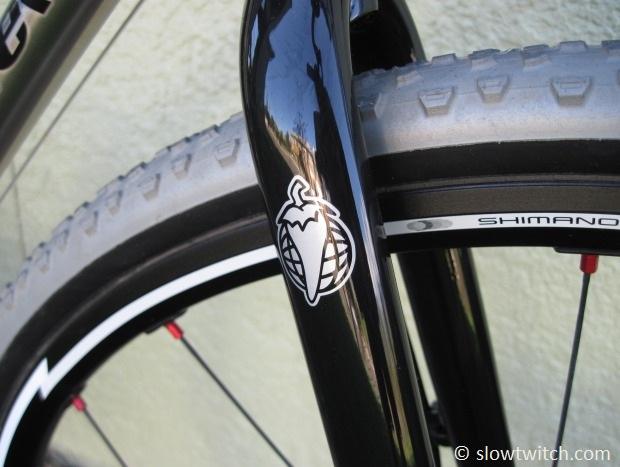
The fork? Steel is real. I went with a Salsa La Cruz disc fork. At nearly 1,000 grams, she ain’t light, but is very stiff and strong. I originally built the bike with a Winwood carbon fork – it was less than half the weight, but suffered from extreme shudder while braking (and subsequently VERY loud brakes). It was just too flexible and light. The Salsa fork immediately cured the flex, vibration, and resulting brake howl.
Geometry
This is the one area which I haven’t fully “optimized”. I originally purchased the frame with no intentions of ever using aerobars on it. It has a 73 degree seat tube angle. I wanted to find a way to get further forward, but not so far that it would upset the weight distribution and handling too much. The head tube angle is a fairly relaxed 72 degrees, which helps (by pushing the front wheel forward, so not too much weight is over it).
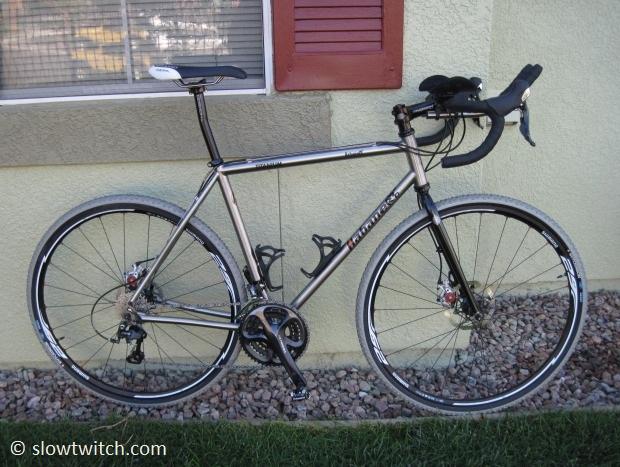
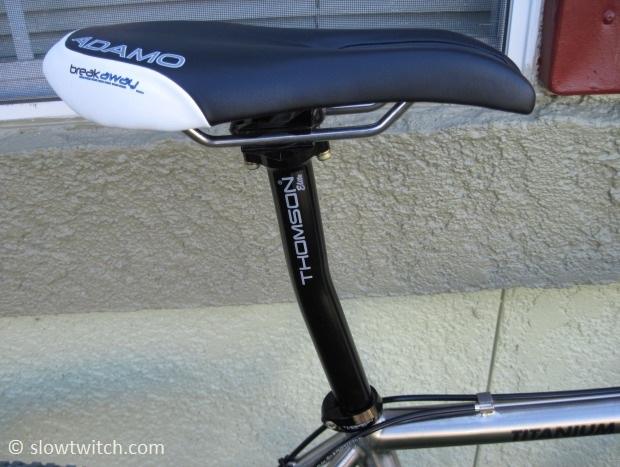
I opted to steepen the seat tube angle slightly by using a Thomson setback seatpost, flipped forward. In my experience, this seatpost is a great choice for these “mid-steep” setups – it gets you forward just enough but retains the stability that the frame designer intended. And, they’re just fantastic seatposts in general. If I had to venture a guess, I’d say I’m sitting at an effective 75 or 76 degrees with this seatpost, and my ISM Breakaway saddle pushed most of the way forward.
The “drop” measurement (from the top of the saddle to the top of the aerobar pads) is 5cm. This is about half of what’s on my normal triathlon bike. Given that my saddle is a few centimeters further rearward than my tri bike, the drop is about where it needs to be for a proper hip angle. Over time, I’ll see if I can handle another 5-10mm. While that may not look like much “drop”, it nets an appropriate back and hip angle for me. I’m one of those folks who was not born with body proportions that result in a bike fit that’s impressive on paper. My forearms are long, so my shoulder-to-elbow measurement is relatively short (and so is my resulting drop measurement). Add in a serious neck injury a few years ago, and this is all the drop I need or can handle.
This Franken-setup actually works quite well. Consider this to be my triathlon bike position, just rotated slightly up and back.
If I really wanted to make the frame “perfect” and start over from scratch, I would want to steepen the seat tube angle a few degrees, use a zero offset post, and shorten the top tube. I’ve done that in a round-about way… it just looks a little funny.
Cockpit
This is where the build starts to get really fun. Well, at least for me. Every piece of equipment here was chosen very specifically.
Drop bar: Zipp Service Course SL
While my original concept intended to use a true triathlon base bar + clip-on system, I ended up opting for a road drop bar with clip-ons. Because our local trails range from “wide-open-and-easy” to “I-should-probably-be-riding-a-mountain-bike-on-this”, I wanted the control that road bars and shift levers offer.
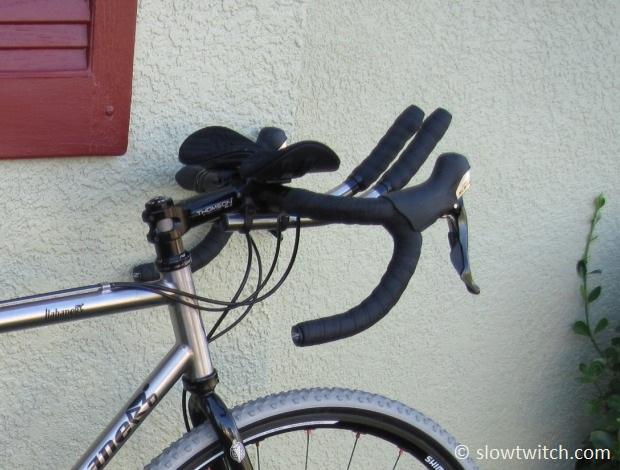
Bar shape: Short and Shallow. Zipp has a new drop shape that’s dubbed “Super short and shallow” – and is similar in shape to some other manufacturers’ new bars. The super short bars make sense for a lot of people. Typically featuring a “reach” measurement of about 70mm, they generally fit great for many hand sizes and offer easy access to brake and shift levers. I specifically did not want that kind of bar, however. Given that I was steepening the bike’s seat tube angle and shortening the top tube with the set-forward post, I wanted to retain as much reach to my shifters as possible. If I went with a super short bar, my cockpit distance would feel awkwardly short. The “regular” short and shallow has a reach of 84.5mm; spot-on for my needs.
Width: 46cm (measured outside to outside). This is 2cm wider than my usual 44cm. Two reasons why: 1) I’ve slowly trended towards wider bars for off-road riding, and 2) Clip-on bars take up a lot of real estate on the bar “tops”… I wanted enough room to retain ability to ride with my hands on the tops. Wider bar = more hand space.
Aerobars
I used the new Zipp Vuka Alumina clip hardware. These were chosen for a few reasons. First, they have a TON of adjustability. Second, the hardware is much improved over the old VukaClip – it now has sturdy steel bolts with Torx heads. Third, the pads have a lot of surface area front-to-back – very important given my half-steep position (the arm pads fall somewhere in the middle of my forearm – not under my elbows, so more surface area = better and more comfortable).
I wanted to use these clip-ons in their lowest position. Zipp did a great job designing a system that allows you to ride with the pads and extensions very high or very low. And – the pads and extensions travel vertically together, which only makes sense. The configuration I chose puts the extensions running under the handlebar, and the arm pads sitting right smack on top of the bar.
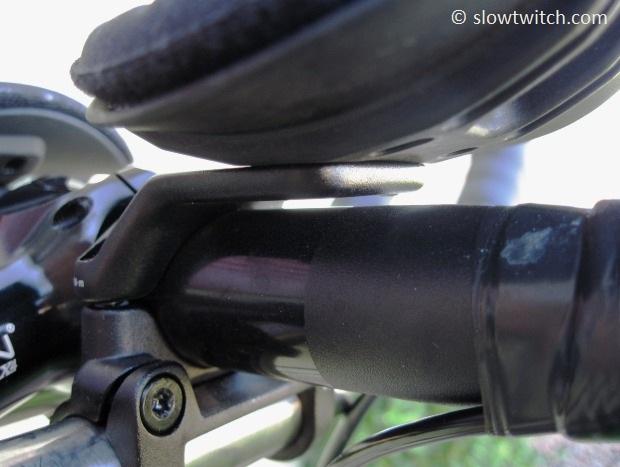
The idea was to get the arm pads as low as possible for a reasonably good aero position. But – I also wanted to keep my drop bar as high as possible, to aid in navigating rough terrain. The closer together I could put the pads and base bar – the better I would accommodate these diametrically opposed priorities.
What’s with the desire for a high handlebar; isn’t lower always better?! Similar to mountain biking, if your handlebar sits too low, your ability to ride drop-offs and steep descents is hampered. Why? When the bar is so low, your arms may be near full-extension while you’re JRA (just ridin’ along). If you encounter a steep drop, your arms don’t have anything more to “give”. As downhill mountain bike legend, Simon Lawton, puts it – you’re at the end of your rope. By having your handlebars higher, you can ride with bent elbows, leaving you with more available arm extension. You see this style of setup with many high-level pro cyclocross racers – they just don’t ride as low as their roadie cousins. Clearly my desired setup for a high drop bar and low aerobars wasn’t in the design priority list for any bar manufacturer… EVER. But I think the execution on this bike works well.
Stem
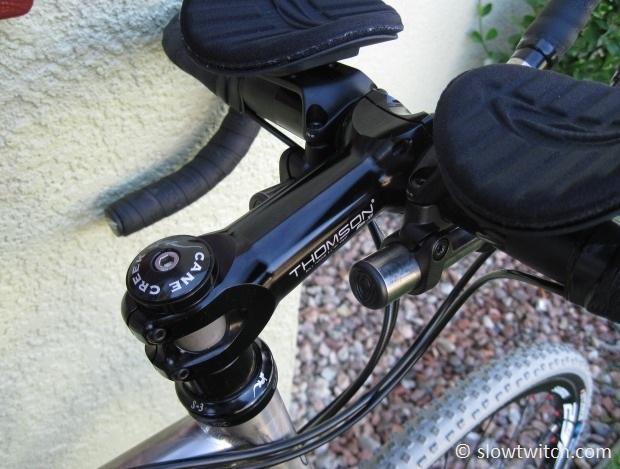
The stem is a Thomson X4 mountain bike stem. 120mm length and zero drop (90 degree). I went with zero drop to get a little lower than I was before (sans clip-ons, with a 6 degree stem, turned up)… but without getting too low. These stems are known for being rock solid, so it was an easy choice.
Bar Tape
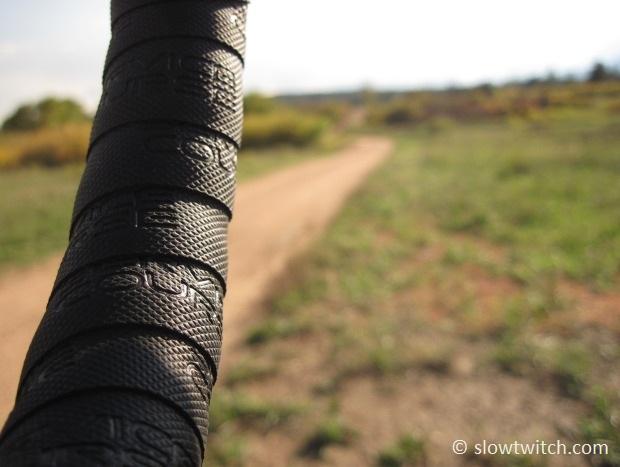
Zipp Service Course CX. This is currently my favorite bar tape in the whole wide world. I think it’s one of the best products that Zipp makes. It’s grippy, but not sticky. Comfortable, but not too soft. It just has a great feel – wet or dry, with or without gloves. Did I mention I love this stuff? Five stars.
Aero Extensions
Check these babies out:
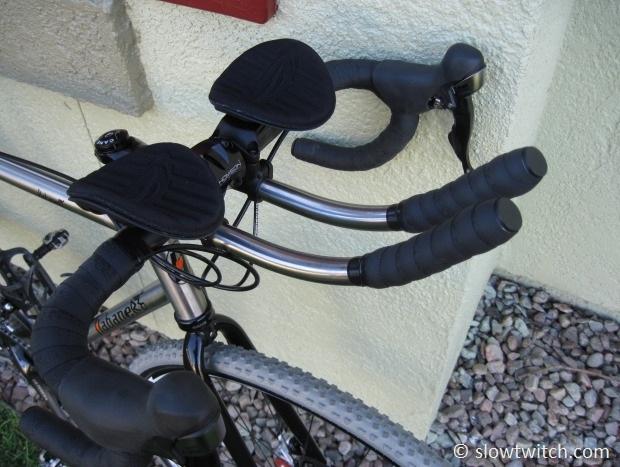
What the?! Yes – those are custom titanium aero extensions. The shop that fabricated them asked to keep their identity secret, as they don’t normally make this kind of stuff. I actually had them made years ago for a project that ended up requiring a different aerobar setup than we originally thought. They sat in my parts bin for years. They are standard 22.2mm diameter, and cold-formed to my desired specs.
I originally tried the Zipp aluminum “ski tip” extensions. I think they’re great. They fit a lot of people, are reasonably priced, easy to cut, and hard to damage. The issue that arose was the fact that I’m not using a bar-end shifter plugged in to those great extensions. The extension-under-bar setup I’m using has a greater vertical distance from arm-pad-to-extension than any of the over-bar options. When you have a shifter plugged in, it lays just perfectly in your hands. But – without a shifter…
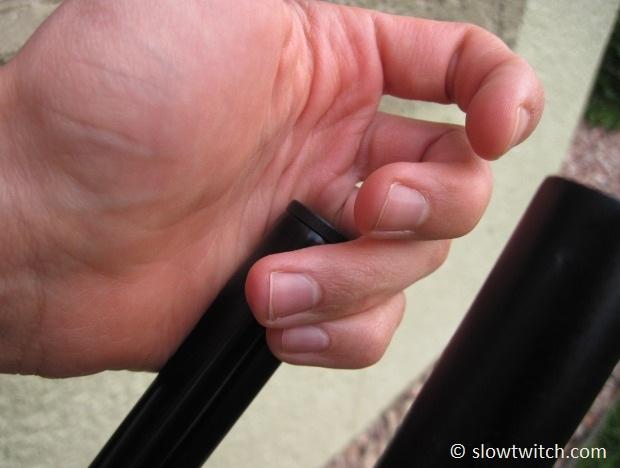
My options were to 1) point my arms down a-la Jan Ullrich TT-style, or 2) use a different extension. My custom titanium extensions are several centimeters longer, and work out to be a perfect fit. Sorry, Jan.
Components
This is another area in which I went to the extreme on practicality. Let’s take a look at that drivetrain.
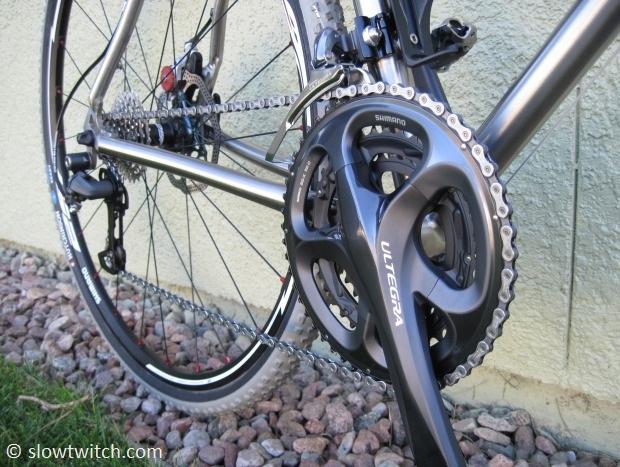
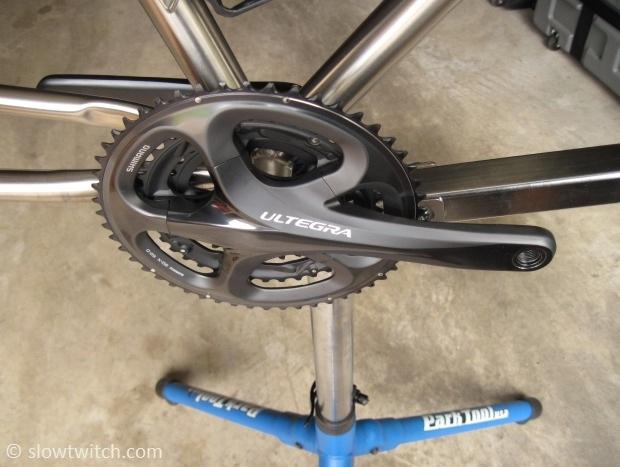
Think the crankset looks funny? You bet it does. Specifically – look at the chainrings. Count ‘em and weep – there are three of them:
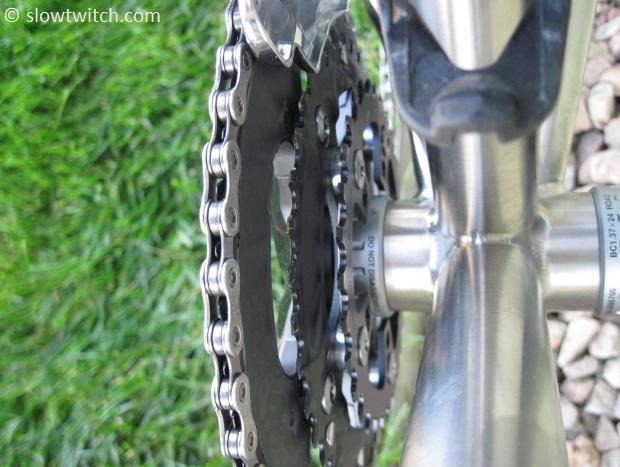
This bike has Shimano Ultegra Triple 6703. Well, the shifters are actually 105, but that’s just because the Ultegra’s were out of stock at the time of build. Why triple? As I’ve written about before, I don’t think triples are a bad thing. They have their place. Given my huge variety of terrain, it just made sense (this bike doesn't just see the flat Santa Fe Trail).
Even with a wide range 11-32 cassette, there is not a double-ring system on the market that can match the gear range of the triple. I want the uphill gear, AND the downhill gear. And – if I want to throw the bike on an indoor trainer, I want reasonable size “jumps” from one cog to the next (which the 11-32 does not offer). My chainring sizes are 52-39-30, and the cassette is a 10-speed 11-28. While I only use the small chainring for about 5% of my riding, it is a 5% of steep mountain climbing that desperately needs it. I generally live in the 39 and 52, and use the full range of the cassette.
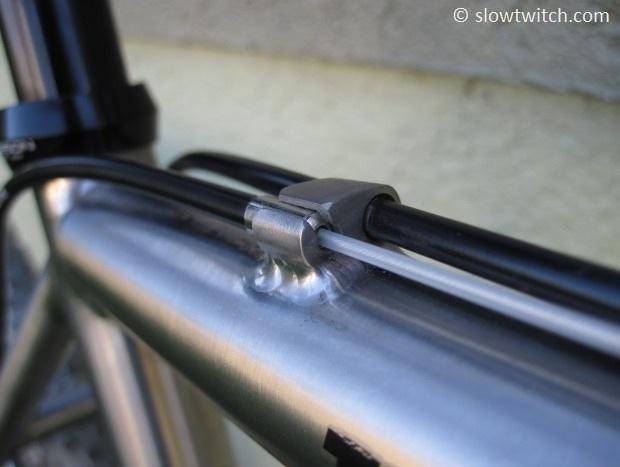
And, of course, since this is a cable-actuated drivetrain, I used the sealed Gore Ride-On system:
Brakes
The brakes are Avid’s BB7 Road mechanical, with Avid organic-compound pads. These have been around for a long time, and haven’t changed much. They don’t need to. I’ve been a long-time fan of this brake. So much that I don’t have a lot to say about them. They just work!
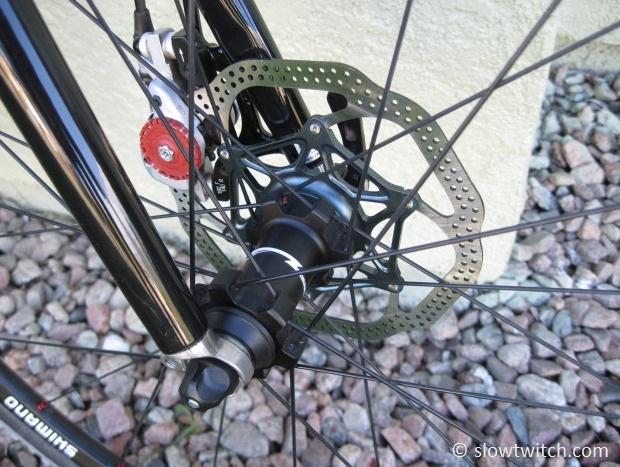
The rotors are Avid 160mm rotors front and rear. Some argue for smaller 140mm rotors for cyclocross. I personally think that is only appropriate for actual cyclocross racing, which generally features tight courses, limited speeds, and no extended descents. That does not fit the picture of what I do with this bike. The best way to combat disc brake overheating is to go with a larger rotor, hence the choice of 160’s.
Rolling Stock
The wheels are Shimano’s WH-MT75 29er mountain bike wheels. Why 29” mountain wheels? My frame has mountain bike spacing – 100mm front, 135mm rear (which is quickly becoming the standard for disc brake cyclocross bikes). The rim diameter on cyclocross bikes is identical to that of a 29” mountain bike – 700c. So – the wheels plugged right in to my bike.
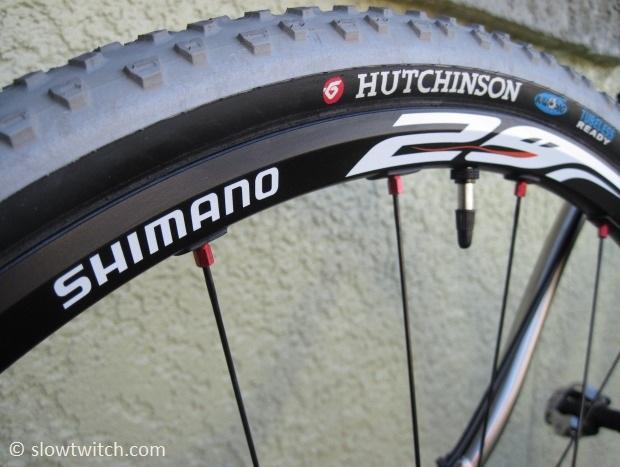
I chose these wheels for two reasons. First, they rims feature no spoke holes and are tubeless-compatible from the factory. Second, the 19mm internal width is wider than most road rims (which are usually 15 or 17mm internal). This helps spread the wide CX tire casing. The only downside is that the narrowest tire I can use on this rim is 28mm. If you wanted to build up a bike like this and use it for road training or group rides, you would likely want to choose a narrower rim that could accommodate 23 or 25mm tires. The third hidden benefit of the wheels is the fact that they use Shimano’s centerlock disc brake interface. This system allows you to change rotors in seconds with only a cassette lockring tool. While that may not sound like a big deal… you’ll understand the importance after changing a single rotor with the standard 6-bolt interface. It’s not hard, but takes about ten times as long as Centerlock.
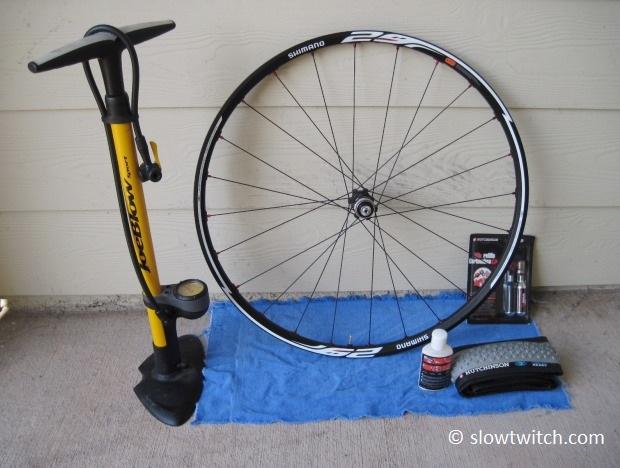
The tires are one of my classic favorites (that has unfortunately been discontinued) – the Hutchinson Bulldog tubeless. They are advertised at 34mm wide, but with my wide rim choice, the casing measures a hefty 35.5mm. I’m using Hutchinson’s Protect’Air sealant, and the stock Shimano tubeless valves. For most riding, I use about 40 psi.
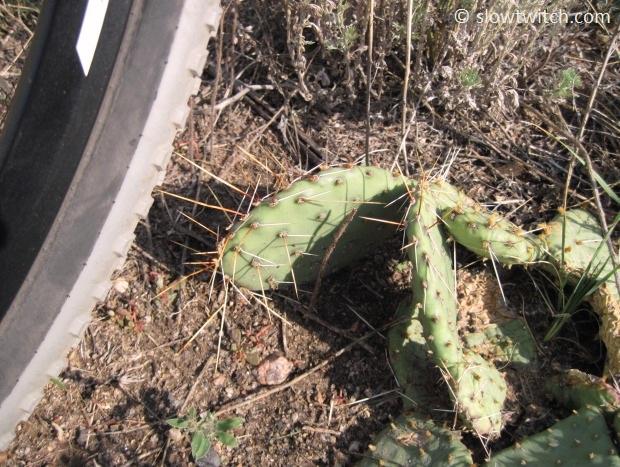
With the tubeless tires and sealant, I shouldn’t have to worry about this…
Sum It Up
This bike setup is admittedly not common. I get that. My purpose with this exercise was to try something new, and hopefully inspire you to think outside the box. YOUR ideal “Uber Training Bike” might look different than mine – and I encourage you to think about what type of bike would best accommodate your priorities, your geography, and your training program. Perhaps it’s as simple as buying a set of shorty ITU-style aerobars to slap on an existing cyclocross bike. Maybe you want to get some studded tires for the winter. Or maybe you want to turn it to eleven on the nerd scale and join me with a full-on triple-laden, aero-cyclocross-disc-tri bike.
Whatever it is, don’t be afraid to look at your training needs from an objective, third-person perspective. I think you’ll find that the best solution may not be the most conventional one… and it’s almost guaranteed to be fun.
Now if you’ll excuse me, I have some dirt riding to do.
All images © Greg Kopecky / slowtwitch.com


Start the discussion at slowtwitch.northend.network